Tuesday, November 26, 2013

banana cream pie (gluten-free & dairy-free)


Today is all about pie. 
Well it's really about bananas. and cream. and pie.
And unicorns.
And fairies.
And dreams come true.
Because this pie and all those things truly belong in the same category.


Who ever thought you could make pudding from coconut milk?
I didn't until I tried it.
And wowzers, it was much better than I expected.


Banana cream pie is all about the bananas...duh!


Oh, and the delicious pudding too.


And maybe the cream topping as well.


Banana Cream Pie (gluten-free & dairy-free)


Pie Crust

1 1/2 cups gluten-free animal cookie crumbs (I use Kinni-Kritters)
4-5 tablespoons Earth Balance, melted
3 tablespoons brown sugar
3 large bananas, sliced (for later use)
  1. In a food processor, crush cookies until they are crumb-like. Mix together crumbs, dairy-free butter, and sugar in a bowl. Press into a 9 inch pie plate. Bake at 325 degrees F for 8-9 minutes. Cool and fill as directed.


Pudding / Custard

3/4 cup to 1 cup white sugar
5 tablespoons cornstarch
1/2 teaspoon salt
3 cups coconut milk
2 egg yolks (for vegans: use a spoonful Earth Balance and a few drops yellow food coloring)
1 teaspoon coconut extract
1 teaspoon vanilla extract

  1. Combine the sugar, cornstarch, and salt into a saucepan. Turn on medium heat and stir in the coconut milk, gradually, stirring the entire time. When the mixture has come to a boil, let it bubble for 2 minutes and stir constantly. When the pudding has thickened, remove from heat.
  2. Stir 1/4 cup of the pudding mixture into the egg yolks (or dairy-free butter if making vegan), stirring continuously until it is all mixed together. Pour the egg mixture back into the remaining pudding. Cook on medium heat for 2 more minutes.
  3. Remove the pudding from the heat. Add the coconut extract and vanilla extract. Give it one last stir.

Vanilla Cream Topping

1/2 cup coconut oil, melted
1/2 cup dairy-free butter (Earth Balance)
2 teaspoons vanilla extract
1-2 cups powdered sugar (add more or less, to your liking)
  1. In a food processor (or with a hand-blender), whip together the coconut oil and dairy-free butter. Add in the vanilla and powdered sugar. Mix until smooth.

Assembly...
  1. In the bottom of your crust, lay your sliced bananas. (You may want to use only 2 1/2 bananas and save the other 1/2 banana for garnishing.) Pour the custard/pudding into the crust.
  2. Cool pie (with custard filling) in the refrigerator, or freezer if you are in a hurry. If cooling in the freezer, it should take about 1 hour to cool. If cooling in the refrigerator, it should take a few hours to completely cool.
  3. When cooled, spoon on the cream topping. Store pie in refrigerator until ready to serve.
  4. When ready to serve, garnish with remaining banana slices.

YUM!


I got a few of my ideas from this blog right here.

Friday, November 15, 2013

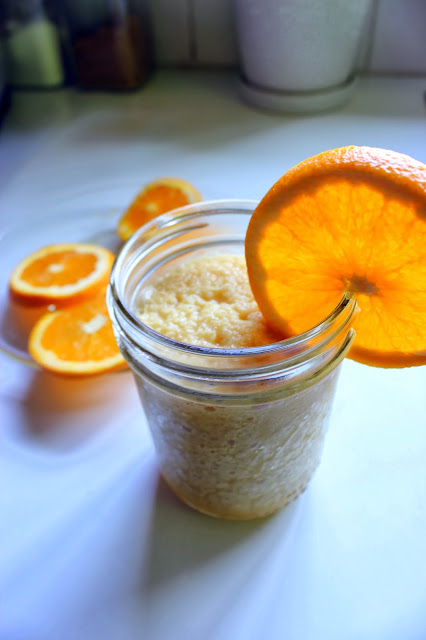
Vegan Orange Julius


Do you remember my post about the Vegan Cookie Dough Bites made with Simply Stevia? Well this is my second post using Simply Stevia's product.

They didn't ask me to create two recipes with their product, but I wanted to. And this vegan Orange Julius was the first thing that popped in my head to make. Boy oh boy, was it tasty! 
Oh, and guess what? No added sugar! (Only all natural sweeteners, baby!)

Orange Julius is something that is very nostalgic for me. I will never forget going to the mall and begging my mom to buy me that sweet, delicious orange smoothie. This recipe definitely does the original Orange Julius justice, and more! It tastes like a mix between an Orange Julius and an Orange Creamsicle. DOUBLE WHAMMY! (Yeah, I know...its goodness surprised me too.)


Vegan Orange Julius

serves about 3-4

1 can frozen orange juice concentrate, partially thawed (only use 8 oz.)
1 cup almond milk (or soy milk)
3/4 cup to 1 cup water
2 teaspoons vanilla extract
2-3 packets Valencia Orange Stevia (to taste)
10-12 ice cubes 
  1. Put all the ingredients, except the ice, into the blender (or food processor). Blend/process until ingredients are just mixed. Add the ice cubes. Blend until smooth. It should look a bit frothy.
  2. Taste and see if any more vanilla or stevia needs to be added. 
  3. Pour into a tall glass and slurp with a straw.


Saturday, October 26, 2013

Vegan Protein Cookie Dough (Gluten-free)

A while back, I received an email from a company called Simply Stevia

Simply Stevia is a company that sells stevia products. If you don't know what stevia is, it is a natural sweetener that comes directly from the Stevia Plant. Research shows that stevia is helpful in treating multiple health conditions, aiding people with weight loss, and even treating diabetes. In cooking, stevia is used as a non-caloric sweetener and flavor enhancer.

The stevia from Simply Stevia is of really high quality. I loved that it wasn't too grainy and had the perfect amount of sweet to it. (They also sell liquid stevia.)

They asked me if I would be interested in some free product in exchange for a few recipes in which I used their stevia. I was pretty excited. I couldn't decide on a flavor for them to send, so they graciously sent me a box of their mixed flavors, which includes Peach, Caramel Delicioso, Pomegranate, Natural, Mixed Berries, Valencia Orange, and Mango.


The first thing I did was use the stevia in my morning herbal tea. It was really tasty. I am a lover of Bengal Spice herbal tea from Celestial Seasonings. I put boiling water in a large mug, steeped the tea bag in the water for about 5 minutes, then removed the tea bag and stirred in one packet of Caramel Delicioso Stevia and about 1/8 cup almond milk. The flavor combination of the cinnamon, cloves, ginger, vanilla, and Caramel Delicioso was divine.


After that, I wanted to experiment a little bit. I looked in my pantry and grabbed a can of chickpeas and oats. My body was craving one thing and one thing only: cookie dough.


After mixing together the chickpeas, oats, peanut butter, almond milk, vanilla, cinnamon, Caramel Delicioso Stevia, and chocolate chips, I knew my task was complete. 


Oh my GOODNESS GRACIOUS...
My cookie dough was perfect. Now I just needed to roll them into cute little bite-sized pieces.


My work here was done.


Vegan Protein Cookie Dough

gluten-free

about 2 cups cooked chickpeas, drained and rinsed (I used one 15 oz. can)
4 Tablespoons natural peanut butter
3 Tablespoons oats 
1/4 cup almond milk
2 teaspoons vanilla extract
a pinch of salt
3 dashes ground cinnamon
1/4 to 1/2 cup chocolate chips (vegans: use semi-sweet)

  1. In a food processor, pour in the drained and rinsed chickpeas. Process for about 5 seconds. Add in the peanut butter and oats. Process for 15 seconds. Pour in the almond milk, Caramel Delicioso Stevia, vanilla, salt, and cinnamon. Process until smooth, for about 30 or so seconds. 
  2. Make sure to taste-test your cookie dough at this point. Add in any more stevia or cinnamon that you need. 
  3. Throw in about half of the chocolate chips and process into the cookie dough for about 20 seconds. Remove the cookie dough from the food processor and stir in the other half of the chocolate chips. (You can also choose to add in more oats here.)
  4. Roll the cookie dough into bite-sized pieces or eat with a spoon straight from the container. :)  
  5. Store in the fridge covered with plastic wrap or in a zippie.

Saturday, September 21, 2013

Gluten-free Banana Bars with Salted Caramel Frosting


Last week, it was my close friend's wedding reception. When she asked me to make her wedding cake, I could have not been happier. The only catch was that the cake couldn't contain gluten or chocolate (she is allergic to both).

But I was up for the challenge. Due to my intolerance to wheat and dairy, I have had plenty of experience baking all sorts of gluten-free/dairy-free sweet treats in the kitchen. (Not a lot of gluten-free wedding cakes, though.)

I ended up making a vanilla gluten-free wedding cake with a peanut butter filling and a salted caramel frosting. It turned out to be quite beautiful. Definitely one of my favorites: click here for more of my wedding cakes.


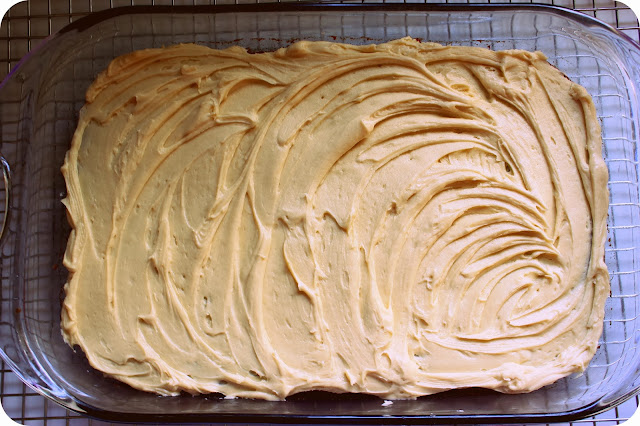
Long story short, I had plenty of leftover salted caramel frosting. And what do you do when you are overrun with overripe bananas? Banana bars of course. The combination sounded perfect!


Gluten-free Banana Bars

1 cup white sugar
1 cup mashed very ripe bananas (about 2 large)
1/3 cup vegetable oil (or coconut oil)
2 eggs
1 cup gluten-free flour mix (I prefer 1/2 cup Bob's Red Mill GF all purpose and 1/2 cup white rice flour)
1 teaspoon baking powder (GF certified)
1/2 teaspoon baking soda
1/2 teaspoon ground cinnamon
1/4 teaspoon salt
a pinch of xanthan gum

  1. Heat your oven to 350°F. Grease bottom and sides of 9x13-inch glass baking dish, with shortening (or coconut oil). In large bowl (or your stand mixer), mix together sugar, bananas, oil and eggs. 
  2. Stir in the gluten-free flour, baking powder, baking soda, cinnamon and salt. Stir in the xanthan gum. Spread in pan.
  3. Bake the bars for 20 to 25 minutes or until toothpick inserted in center comes out clean. Cool completely and then top with salted caramel frosting.


Salted Caramel Buttercream Frosting

1 cup butter (I used dairy-free margarine), softened
1/4 + teaspoon salt (add more to your liking)
3 1/2 cups confectioners' sugar
1 teaspoon milk (if needed)
1 teaspoon vanilla extract
1/4 teaspoon rum extract
1/4 teaspoon coconut extract
  1. In a bowl whip butter for 10 seconds. Beat in powdered sugar, until blended. Add the extracts (and milk) and beat until smooth and creamy.
  2. Spread onto banana bars.

Tuesday, August 20, 2013

granola balls (gluten-free, dairy-free)


So let's just say that I am kind of, a little bit, maybe...obsessed with these.
I make them once a week.
I really love them...and it's a bit ridiculous.


I have been making granola bars for a few years now, and I am always trying to perfect my already "perfected" recipe. Yeah, kind of pathetic. Oh well. But truly, this one is divine.


Yesterday I got vaccinated for Tetanus. Do you know that you have to get it every 5 years? I didn't. Since I am going to be teaching 5th grade this year (in like 2 days! ah!), I had to get it. After sticking me with the needle, they handed me a sheet of paper that listed all the possible risks and problems following the vaccine. "You may experience a fever over 102 degrees F, headache, vomiting, nausea, diarrhea, and swelling of the entire arm..." Blah, blah, blah. I tossed it in my bag and forgot about it. Until about 2 o'clock this morning. I woke up with a fever and chills, my body was achy, and I was a vomit machine. (Hmmm...how do you like that mental image?) Needless to say, I was sick as a dog all day. And my chances of getting sick? 1 out of 300. Lucky me.

The only thing I could keep down were these little guys. Thank the stars for 'em.


And who doesn't love a granola ball - making party?
Every couple weeks, I get together with my favorite girls and we have a blast whether it's shopping, making granola bars/balls, or just chatting. 

Every girl deserves a girls night every once in a while. :)


Granola Balls

gluten-free, dairy-free


2 cups oats (gluten-free certified, if preferred)
2 cups puffed rice cereal
1/2 cup raisins (or dried cranberries or chocolate chips)
1/4 cup dry roasted peanuts
1/2 cup honey
1/2 cup brown sugar (or sucanat)
1 cup peanut butter
1 teaspoon vanilla
1/4 teaspoon salt
1/2 teaspoon ground cinnamon


  1. In a large bowl, mix together rice cereal, oats, and raisins. 
  2. In a smaller bowl, stir together honey, sugar, and peanut butter, and heat in microwave until warm and slightly bubbly (about 30 seconds). Remove bowl from microwave and give the mixture a good stir. Place back in microwave and warm for another 30ish seconds. Remove and stir in vanilla, salt, and cinnamon.
  3. Pour peanut butter mixture over dry cereal mixture. Mix well. Wet your hands with cold water. Grab a palm-ful of granola and form into a ball, making sure to apply as much pressure as you can so the ball does not fall apart. Continue to do this until all the granola mixture is formed into balls. (This recipe will make about 25 granola balls.)
  4. Place the granola balls into a large ziploc baggie and store them in the freezer or fridge. This will help them last longer.
*Feel free to make all sorts of flavor combinations. A really good one is Nutella Granola Balls. Simply omit the raisins, peanuts, brown sugar, peanut butter, salt, and cinnamon. Mix together 1 cup Nutella with a few spoonfuls of warmed honey and vanilla. Pour that over the dry cereal/oat mixture and mix well. Form into balls, place in a large ziploc baggie and freeze/refrigerate until ready to eat.


Friday, August 9, 2013

slow cooker chicken quinoa chili


This past week, my husband and I were in Minnesota for a family reunion. We meet every two years and have a blast playing games, talking, getting competitive in volleyball, and of course--eating. Since my family is so huge, we have to rent out some pretty big cabins to fit us all in. This year was awesome because there was a lake right next to our cabins. And who doesn't like to freeze their butt off in the ice cold water?! Am I right?


Basically, the entire time we were there it was chilly. We were even cooped up for two days in the cabin because of the rain. But heck, it was still a lot of fun.


I thought I had escaped the cold when we left the cabin this morning, but not so. As of now, I am sitting in the Kansas City airport with my husband, waiting for our connecting flight to Salt Lake City. And guess what? It's freezing here! Come on summer--show yourself!

All this cold weather got me thinking about soup and chili. Then I realized that I haven't posted this recipe yet--and it's one of my favorites. Slow Cooker Chicken Quinoa Chili.


Slow Cooker Chicken Quinoa Chili


gluten-free, dairy-free

3 (14 ounce) cans of diced tomatoes
1 (4 ounce) can diced green chilies
1 (15 ounce) can of black beans, rinsed and drained
1 (15 ounce) can of chili beans, rinsed and drained
1 (15 ounce) can of corn, drained
2 cups chicken broth
2 large boneless skinless chicken breasts (uncooked)
2 teaspoons garlic powder
2 teaspoons onion powder
2 teaspoons cumin
1/2 teaspoon red pepper flakes
2-3 teaspoons chili powder
salt, to taste
hot sauce, to taste (if you like it spicy)
1 cup of uncooked quinoa, rinsed
toppings of your choice (avocados, cilantro, lime, sour cream, cheese, tortilla chips)
cooked brown or white rice (optional)

  1. After you rinse the quinoa, add everything into a 6 quart slow cooker. Simply stir and put on the lid.
  2. Cook on low (for 6-8 hours) or on high (4-6 hours). If you're using frozen chicken you may have to cook it longer.
  3. After chicken is cooked, remove it and shred it (two forks work great). Return shredded chicken to slow cooker. Either turn off slow cooker or leave on low, until chili is ready to serve and eat.
  4. Serve with your preferred toppings and/or cooked rice.
My husband and I ate this on top of rice. However, if you are eating it on top of rice, you can choose to omit the quinoa from the chili.


*This recipe is adapted from The Girl Who Ate Everything.

Thursday, July 4, 2013

acai bowls (gluten-free, dairy-free, vegan)


Acai bowls are my favorite.
When I lived in Hawaii, I lived on acai bowls and shave ice from Matsumoto's.
After spending all day on the beach, I was always in the need for something fruity and fresh.
And these were the perfect solution.


Usually I make my acai berry mix in the blender, but this time I tried it in the food processor, and worked out even better.

It's all about the layering: acai berry smoothie, granola, sliced bananas, and a drizzle of honey.
Perfecto.


Acai Bowls

gluten-free, dairy-free, vegan
serves about 2-3 people

1 pack frozen pure acai (I like the Sambazon smoothie packs)
8 ounces (about 1 cup) frozen mixed berries
1/2 to 1 cup almond milk (or apple juice)
1 banana
1 to 2 tablespoons sweetener (brown sugar, honey, or stevia)

Toppings: sliced banana, sliced strawberries, granola (I used my homemade blueberry granola), honey
  1. Combine acai, berries, and almond milk (or juice) in a blender (or food processor) and blend well. Blend in a banana, until smooth. Mix in sweetener, until you reach the sweet taste you prefer. The mixture should be quite thick. 
  2. In a bowl, pour in the smoothie. Next, top with granola and sliced bananas (or any other fruit). At last, drizzle with honey.
  3. Eat in complete happiness.


Wednesday, June 19, 2013

strawberry lemonade cupcakes (gluten-free)


All you ready need for strawberry lemonade cupcakes are some strawberries...
and lemons...


...oh, and maybe some cupcakes.


And frosting, of course.


What is summer? Summer is laying out in your swimsuit, running through the sprinklers, eating a drippy popsicle, wearing no shoes outside, and riding your bicycle in the warm evening air...
These cupcakes are the epitome of summer. They are sweet, tangy, fresh, light, and fun.
If you are feeling sad, eat one of these cupcakes, and I promise you that your day will seem brighter and happier.
I pinky swear.


Strawberry Lemonade Cupcakes 

gluten-free
can be dairy-free

1 cup sugar
6 Tbl. butter (for dairy free, use coconut oil or Earth Balance)
2 eggs
2 tsp. vanilla
1 1/2 cups gluten-free flour mix (1/2 cup brown rice sugar, 1/2 cup white rice flour, 1/2 cup tapioca starch)
1 1/4 tsp. baking powder
1/2 cup milk (for extra lemon flavor: 1/8 cup fresh lemon juice + 1/4 and 1/8 cup milk; for dairy free, use almond milk)
grated zest of 2 lemons
2 dashes of xanthan gum
  1. Heat oven to 350 degrees F. Prepare a cupcake pan with cupcake liners.
  2. In a large bowl or stand mixer, cream together butter (or coconut oil/Earth Balance) and sugar until fluffy. Mix in eggs. Add vanilla. 
  3. In a bowl, stir together dry ingredients. Mix dry ingredients into wet ingredients by increments. Stir in milk. Add in lemon zest. Stir well. At last, stir in xanthan gum. 
  4. Pour batter into cupcake liners. Bake for 15-20 minutes. (Make sure to keep an eye on them.) Cupcakes will be done when they turn a light golden color. Insert a toothpick into the center cupcake; if it comes out clean, then the cupcakes are done. 
  5. Cool cupcakes for a few minutes and then remove them from the cupcake pan and allow them to cool on a wire rack. 
  6. When they are completely cool, go ahead and frost them with my Strawberry Lemonade Frosting (see below).


Strawberry Lemonade Frosting

1/2 cup butter (for dairy free, use Earth Balance)
2 cups powdered sugar
1/4 tsp. salt
1 tsp. vanilla
3-4 strawberries
2 Tbl. frozen lemonade concentrate, at room temperature (or 2 Tbl. milk  *see alteration below)
  1. Before you start making the frosting, chop up the strawberries. (You can also puree them in a food processor, which I did--and I recommend it).
  2. In a large bowl or stand mixer, cream the butter (or Earth Balance) until it is smooth. Add the powdered sugar, in increments. Add in salt and vanilla. 
  3. Stir in the chopped (or pureed) strawberries.
  4. Stir in the lemonade concentrate. At this point, you will want to whip the frosting very quickly, until it looks light and fluffy.
  5. Cool frosting for a few minutes in the fridge, give it a good stir, and then frost your cupcakes!
*The citrus in the lemonade concentrate may cause the frosting to curdle a little, so you can choose to replace the lemonade concentrate with milk. To add in lemon flavor to the frosting (with added milk), you can simply garnish the frosted cupcakes with lemon zest or you can brush the top of the cupcakes with lemonade concentrate before frosting them. Personally, I think the frosting is perfect with the lemonade concentrate added in. If you look at the picture below, you will see that the frosting looks normal (and it tastes amazing). In my opinion, the added lemonade concentrate makes the frosting what it is. (Note: the pictures above and the one below were made with two different frosting recipes. Obviously, my first frosting recipe from the cupcakes pictured above didn't turn out as well as this one...)


click here to see my original strawberry lemonade cupcakes.

Related Posts Plugin for WordPress, Blogger...