Tuesday, January 29, 2013

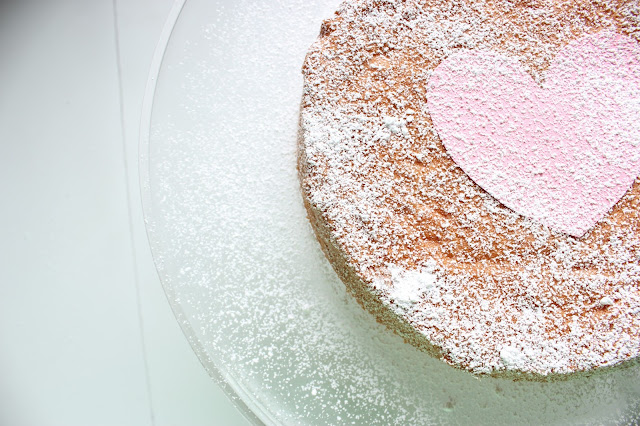
[flourless] lemon almond cake


When it comes to gluten-free baking, most people tend to turn up their nose.
"Baking without flour? Isn't that an oxymoron?"
"Gluten-free products are never as good as the regular ones."
"I just can't give up eating flour, that would be impossible!"
Well, today is one of those days where those people are wrong.


This cake is the perfect combination of lemon and almond, with just enough sweetness.
It's light, moist, and delicious in every way.


Flourless Lemon Almond Cake (gluten-free)

  • 4 eggs, separated into 4 egg yolks and 4 egg whites, room temperature
  • 2 tablespoons lemon zest, packed
  • 1/4 teaspoon ground cinnamon
  • 1/2 cup white sugar, divided (1/4 cup and 1/4 cup)
  • 1 1/2 cups finely ground almond flour*
  • 1 teaspoon baking powder
  • 1 teaspoon fresh lemon juice (white or cider vinegar works too)
  • Pinch of salt
  • Powdered sugar for sprinkling
* If almond flour is not available at your market, you can grind up blanched, slivered almonds in a food processor until finely ground.


1) Preheat the oven to 350°F.  Place a round of parchment paper on the bottom of a 8-inch cake pan (or a springform pan), and grease it and the sides of the pan with butter or cooking spray. (I recommend also flouring the pan with rice flour so it comes out easier.)

2) In a large bowl, beat together the egg yolks, lemon zest, and 1/4 cup sugar until smooth.

3) In a separate bowl, whisk together the almond flour, ground cinnamon, and baking powder.   Add the flour mixture to the egg yolk mixture and beat until smooth.

4) With an electric mixer with a very clean bowl and clean whisk attachment, beat the egg whites, starting on low speed and gradually increasing the speed. When bubbles start to form, add a pinch of salt and the teaspoon of lemon juice or vinegar (both the salt and the juice/vinegar will help the beaten egg whites maintain better structure, as will the sugar in the next step). As the egg whites begin to increase in volume, sprinkle in the remaining 1/4 cup of sugar, a little at a time, as you continue to beat the eggs whites.  Beat until soft peaks form.

5) Fold the beaten egg whites into the almond mixture a large scoopful at a time.  You won't get much lift with the first third of the egg whites, but as you add more, you'll be able to gently fold in the whites in such a way as to create a light batter.

6) Gently scoop the batter into a the prepared springform pan and place in the oven. Bake for 25 to 30 minutes. Remove from the oven and let cool. Run a sharp knife around the edge of the cake helping it to separate from the side of the pan. Flip the pan upside down (gently) onto a cooling rack; lift the pan away from the cake. Let the cake cool for about 10 minutes, then place it on a serving plate. (If using a springform pan, release the springform pan sides, and gently move the cake to a serving plate.) Sprinkle with a little powdered sugar before serving.

7) If feeling adventurous, make a blueberry compote and fresh whipped cream to go on top of the cake. I really recommend this. I did this for my mother-in-law's birthday, and my family absolutely LOVED it. The blueberry compote and whipped cream add a wonderful tangy & sweet contrast to the already delectable cake. See the recipes for the blueberry compote and fresh whipped cream below...


Blueberry Compote

2 cups frozen blueberries
1/4 cup water
1/4 cup white sugar
2 teaspoons lemon juice

Combine 1 cup of the blueberries, water, sugar and lemon juice in a small saucepan. Cook over a medium heat for about 10 minutes. Add the rest of the blueberries and cook for 8 minutes more, stirring frequently. Remove from heat and allow to cool completely. Spread this on top of your cake.


Fresh Whipped Cream

2 cups heavy cream
2 teaspoons vanilla extract
1/4 cup confectioners' sugar

In a large bowl, whip cream until it starts to thicken. It will look like stiff peaks are just about to form. Add in vanilla and sugar, and beat until peaks form. (Make sure not to over-beat, as your cream will become lumpy and butter-like.)


Thank you Elise, for your inspiration :)


This is what your cake will look like with the blueberry compote and whipped cream. TRUST ME, you will love this combination!


My husband's littlest sister: Panda-Bear (AKA Danielle)


Happy Birthday Alisa! My mother-in-law turned 47 and is more beautiful than ever.
We all pitched in and got her tickets to Phantom of the Opera.
My husband and I saw it already and loved it.


Steve (my father-in-law) got his wife two diamond bands to go around her wedding ring.
So beautiful.

Sunday, January 20, 2013

Oatmeal Chocolate Chip Cookies (gluten-free)


Cookies and milk.
Just look at it.
You know you want it.


By the way, my husband can't stop eating these cookies.
And that is a big deal.
Especially when it comes to gluten-free baking.
So yeah, um, they are delicious is what I am saying.


Sorry, I couldn't resist. I just had to take a bite.


Oatmeal Chocolate Chip Cookies (gluten-free)

  • 1/2 cup butter, softened (or 1/4 cup butter + 1/4 cup peanut butter)
  • 2/3 cup brown sugar, packed
  • 1 large egg
  • 1/2 teaspoon vanilla extract
  • 3/4 cup rice flour (mixture of white and brown rice flours)
  • 1/2 teaspoon xanthan gum
  • 1/2 teaspoon baking soda
  • 1/4 teaspoon ground cinnamon
  • 1/4 teaspoon salt 
  • 1 1/2 cups rolled oats (gluten-free certified)
  • 1/2 cup chocolate chips (add more if you want)

In a large mixing bowl, cream together the butter and brown sugar. Add the egg and vanilla and mix until smooth. In a separate bowl together the rice flour, baking soda, cinnamon and salt. Stir this into the butter/sugar mixture. Mix in the xanthan gum. Stir in the oats and chocolate chips.

Once you reach this point, you can choose to chill the dough for a few minutes in the freezer (or fridge), or scoop the cookie dough onto a sheet and then chill them on the whole tray, before baking them. Either way works.  If you choose to bake them right away, your cookies will spread out more and be less thick. Whatever floats your boat, heat the oven to 350°F right away, so that it’s fully heated when you’re ready to put in the cookies.

Make sure the cookies are two inches apart on a parchment-lined baking sheet. Bake them for 10 to 12 minutes (your baking time will vary, depending on your oven and how cold the cookies were going in). Take them out when cookies are golden around the edges but still a little undercooked-looking on top. Let them sit on the hot baking sheet for five minutes before transferring them to a rack to cool.

This recipe was inspired by the lovely Smitten Kitchen.


Monday, January 14, 2013

Oatmeal Spice Cookie Bars

Baby, it's cold outside.
As I was walking to school, my ankles and feet were aching. Yes, aching. 
By the time I got inside, I was sure they needed to be amputated.
Over-exaggerating? I think not. Take a look for yourself...


Today's high was 8 degrees F. Tonight it's going to get down to -4 degrees.
But I can't complain too much because my family went to church in -10 degree weather last week.
It's at those times when I am grateful that I don't live in Wyoming anymore.

Let me tell you something though. When the weather is cold, there is something I do best.
I bake treats.
Tasty tasty treats.
All for me (and my husband too, if I am feeling nice enough).
And today I made Oatmeal Spice Cookie Bars.


Oatmeal Spice Cookie Bars

  • 1/2 cup quick oats 
  • 1 cup raisins 
  • 1 cup almonds (I tried 1/2 cup almonds + 1/2 cup sunflower seeds...super tasty)
  • 1 teaspoon honey (optional)
  • 1/2 teaspoon vanilla extract
  • a pinch of salt (to taste)

In a food processor or blender, add in the oats, raisins, and nuts. Pulse the blades until coarse crumbs form. Turn off machine and add in honey, vanilla and salt. Blend well. 

Take out mixture and place in a bowl or into your hands. Form the mixture into a ball, using your hands. (It should look and feel like cookie dough at this point.) Press dough into a sprayed 8x8 pan. 

Cut into squares and place in a ziploc baggie. Store in the freezer or fridge.

(inspired by this girl)


As for me, I am going to go warm up with a blanket, some cookie bars, and a good book.
Stay warm, everyone!

Sunday, January 6, 2013

Sarah's Best Homemade Granola Bars


Let's talk.
Granola bars.
They look yummy and they taste good too (hopefully!).
Sadly, they are often full of processed ingredients and refined sugars...since when is it okay to add in high fructose corn syrup and hydrogenated oils?!! NEVER!
Naughty, naughty, Quaker Chewy Granola Bars. They should know better.
And we should know better than to put that nasty stuff in our bodies. Ew! Ack! Guck!
Lucky for you, these granola bars are completely wholesome and 100% delicious.
Double whammy.


Homemade Granola Bars

  • 2 cups oats (I like the combo of 1 cup quick oats and 1 cup whole oats)
  • 2 1/2 cups puffed rice cereal
  • 1/2 cup raisins 
  • 1 tablespoon flax seed (optional)
  • 3/4 cup honey
  • 1 cup peanut butter (non-hydrogenated, all natural kind)
  • 1 teaspoon vanilla
  • 1/4 teaspoon salt
  • 1/2 teaspoon ground cinnamon

In a large bowl, mix together rice cereal, oats, and raisins. 

In a smaller bowl, stir together honey and peanut butter, and heat in microwave until warm and slightly bubbly. Remove bowl from microwave and stir in vanilla, salt, and cinnamon.

Pour peanut butter mixture over dry cereal mixture. Mix well. Pour this granola mess into a sprayed 9x13 pan. Squash the granola down with your hands, as hard as you can.

Put this pan into the freezer and cool for about 30-45 minutes. Remove from freezer and cut granola into squares. Transfer to ziploc baggies and store in the freezer. By keeping them in the freezer, they will stay together easier and last longer.


Related Posts Plugin for WordPress, Blogger...