Tuesday, April 30, 2013

banana cake in a mug


I started making this stuff over a year ago. My first go around, I made chocolate cake in a mug. (You can see it here.)
I told my sister, Leah, about it and she has been making it ever since. In fact, she bought an entire case of canned pumpkin to make it. She puts pureed pumpkin and cocoa powder in hers. I think she may love it as much as I do! :)


Here's the great thing about banana cake in a mug...
It's easy: It contains ingredients that you probably already have in your pantry. Plus, you bake in a mug...talk about convenience.
It's quick: It takes less than 5 minutes to make (2 minutes to make, 2 minutes to bake). Who wants to wait forever for banana cake to bake in the oven anyway!
It's tasty: Oh is it tasty with all it's banana-y, cinnamon-y goodness. I could eat it everyday. In fact, recently I have!


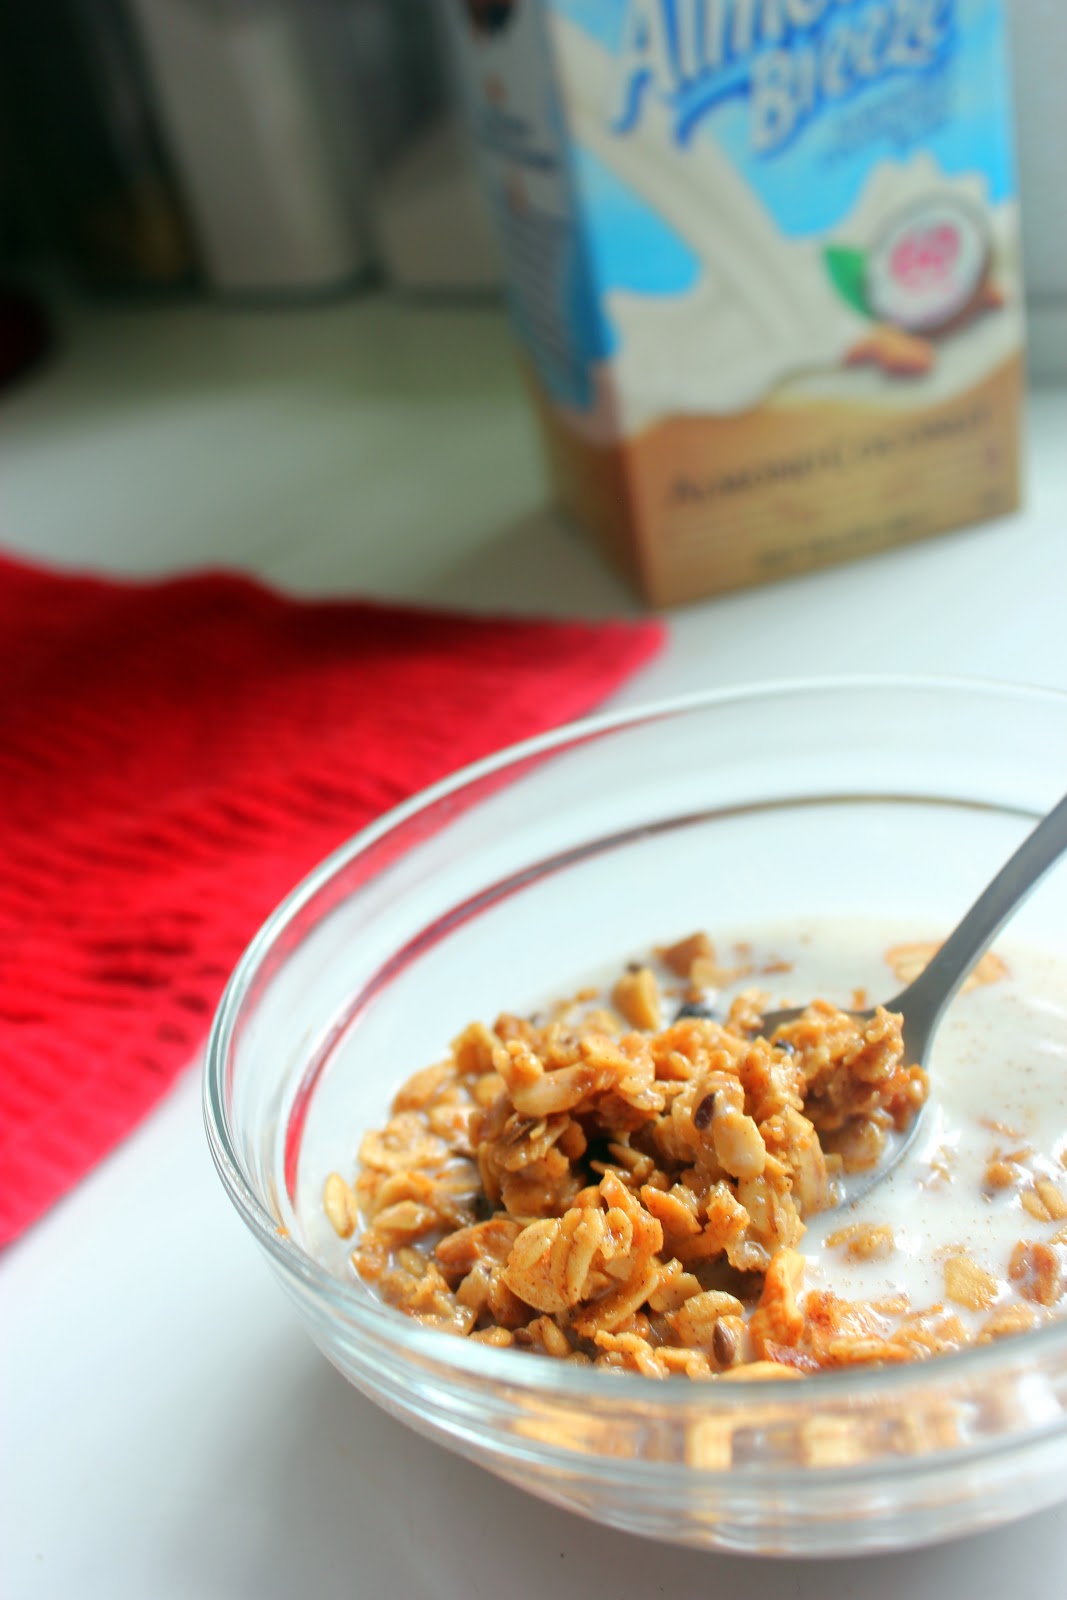
The best way to eat it: right when it comes out--eat half of it, pour some almond milk on the other half, and sprinkle with cinnamon. The milk gets all soaked up by the cake and it tastes like heaven. Get in mah belly.


Banana Cake in a Mug

gluten-free, dairy-free, delicious

1 large microwave-safe mug
4 tablespoons rice flour (I like a mix of brown and white rice flours)
2 tablespoons brown sugar
a pinch of salt
a pinch of baking powder
1 large egg
2-3 tablespoons almond milk
1 over-ripe banana, peeled and mashed
1 teaspoon vanilla extract
a few dashes ground cinnamon

  1. Grease your mug with cooking spray. 
  2. Place all ingredients in the mug and mix with a fork to combine ingredients. 
  3. Microwave on high for about 2 minutes. The cake might look like it is overflowing from the mug, but don't worry! It will settle. (Cooking time varies on the power of your microwave, but it should take from about 1 minute and 30 seconds minutes to 3 minutes. I find that mine cooks perfectly in 2 minutes.) It will be cooked through when the middle of the mixture is no longer bubbling.
  4. Remove from microwave and eat. My favorite way to eat it is to eat half of it, then drench the other half in almond milk and more cinnamon. So good!

Skinn(ier) Banana Cake in a Mug

On days that I am looking more for a "banana snack", I turn to this variation of banana cake in a mug. It's just as good! The difference is less flour, sugar, and no egg yolk. You just have to cook it a tad longer. Enjoy :)

1 large microwave-safe mug
2 tablespoons rice flour (I like a mix of brown and white rice flours)
1 tablespoon brown sugar
a pinch of salt
a pinch of baking powder
1 egg white (the white only)
1 tablespoon almond milk
1 over-ripe banana, peeled and mashed
1 teaspoon vanilla extract
a few dashes ground cinnamon
  1. Grease your mug with cooking spray. 
  2. Place all ingredients in the mug and mix with a fork to combine ingredients. 
  3. Microwave on high for about 2-3 minutes. The cake might look like it is overflowing from the mug, but don't worry! It will settle.
  4. Remove from microwave and eat. YUM!

Sunday, April 21, 2013

[meatless] taco salad + black bean salsa


Do you think that you have tasted the best taco salad ever?
Think again.
Because you haven't until you've tasted this one.
It's so good it will make you cry.
Scout's honor.


It's all about the layering.
Lime cilantro coconut rice, black bean salsa, lettuce, veggies, avocado, more black bean salsa (yes please), and southwest chipotle dressing.

A combination made in heaven, I tell you.


I have been making this black bean salsa for a long time.
And let me tell you, I have yet met someone who didn't love it.
It's true. 
People always ask me for the recipe, but the problem is...I only make it by taste.
However, yesterday I was feeling exceptionally nice and I decided to measure every little thing I added to the salsa. So yes, I will be sharing my recipe with you today.
Hurrah for those tender moments!


Oh, and of course.
A taco salad is not a taco salad without home-baked chips.
Duh!


[Meatless] Taco Salad

makes enough for 4-6 people

1 head Romaine lettuce, rinsed and chopped
1 red bell pepper, seeded and sliced
1 green bell pepper, seeded and sliced
2 tomatoes, chopped
1 cucumber, sliced
1 carrot, chopped
1 avocado, pitted and sliced
Black Bean Salsa (see below)
  1. In a serving bowl, scoop 1/2 cup rice. Top with bean salsa. Top that with romaine lettuce. Top that with veggies. Top those with more bean salsa and avocado slices. Drizzle on the dressing. Garnish with tortilla chips.
  2. Devour.


Cilantro Lime Coconut Rice

2 cups white rice
2 cups water (or 4 cups if using brown rice)
1 tsp. salt
3/4 cup sweetened flaked coconut 
3/4 cup chopped fresh cilantro
1/2 tsp. garlic powder
1/2 tsp. onion powder
1/2 tsp. cumin  
additional salt, if desired
1 lime, juiced
  1. In a saucepan, stir together rice, water, and salt. Bring to a boil over high heat. Steam should be coming out from under the lid; keep the pot covered and don't peek under the lid.
  2. Reduce the heat to very low. The rice will swell as it absorbs the water. Set a timer for 20 minutes (or 40 minutes for brown rice).
  3. When the timer rings, turn off the burner and remove the pan from the heat. Let the rice sit, covered, for an additional 5 minutes.
  4. Fluff rice with a fork. Stir in coconut, cilantro, garlic powder, and cumin. Add in the lime juice. Adjust seasonings to taste.


Black Bean Salsa

2 cans black beans, drained and rinsed
1 can corn, drained
1 can diced tomatoes, drained
1/2 can diced green chilies (about 2 ounces)
1/3 cup red onion, chopped
2 Tbl. brown sugar, packed (add more if desired)
3 tsp. hot sauce (I like the taste of Tapatio)
1 1/2 tsp. lime juice
1 1/2 tsp. onion powder
1/2 tsp. garlic powder
1 tsp. cumin
1 tsp. dried basil
3/4 to 1 tsp. salt
small handful cilantro, chopped

  1. In a large bowl, mix together beans, corn, tomatoes, chilies, and onions. Add in sugar, hot sauce, lime juice, and spices. After mixing well, stir in cilantro. Adjust seasonings to taste.


Home-baked Tortilla Chips

corn or flour tortillas (as many as you want)
garlic salt, to taste
  1. Preheat oven to 400 degrees F.
  2. Lay the tortillas on a cutting board. Stack in a pile. Slice tortillas with a knife, cutting into 4-8 equal triangles.
  3. Arrange tortilla triangles in a single layer on baking sheets. Lightly spray with vegetable oil. Sprinkle with garlic salt. Bake for about 6-7 minutes until crisp and the edges start to curl and turn slightly brown. Watch chips carefully after 5 minutes because they can burn easily. 
  4. Once chips are done, removed from the oven to cool. They will continue to crisp as they cool.


Southwest Chipotle Dressing

1 Tbl. chopped onion
1 Tbl. chopped garlic
2 tsp. dijon mustard (optional)
1/2 tsp. ground cumin
2 Tbl. chopped cilantro
1/2 cup vinegar (rice wine, white, or balsamic)
1 tsp. salt
2 Tbl. honey
1 chipotle pepper in adobo sauce, seeds removed (or chipotle sauce)
1 cup plain yogurt (or sour cream)
1/4 cup olive oil
  1. Combine all ingredients (except olive oil) in a blender or food processor. Blend until smooth. While blade is running, pour olive oil in a small stream into mixture. Blend until smooth. Adjust seasonings to taste.


Tuesday, April 9, 2013

cauliflower pizza crust (grain/gluten/egg/dairy/soy free)


Yes, what you see right there is cauliflower pizza crust.
I didn't even think it was possible.
But it is.
And it's amazing.

However, this pizza crust is not like the other ones you see parading around Pinterest.
You see, this pizza crust isn't loaded with cheese and eggs.
It's actually the tastiest pizza crust I have ever tasted.
(And the healthiest I have ever made for that matter.)
And I love pizza, so that's saying a lot.


I found this recipe on a blog called Real Sustenance.
Let me tell you, that girl knows her stuff.
And after trying this cauliflower pizza crust, I cannot wait to try more of her recipes.
I loved what she said about cauliflower pizza crust in general:

So lets be real. The cauliflower pizza crust that has been trending like crazy.. is gross. OK, so its edible and it has the flavor of pizza..but its texture? blah. It tastes like soggy cheese. I made it today and I even tried all the fancy tricks like straining all of the liquid from the cauliflower in a cheesecloth. Still just blah.  We can do better.

That is when her "revamped and better than ever cauliflower pizza crust" came about.
And thank goodness it did.
Oh, and just so you know...my husband LOVED this pizza crust.
Yes, it's really that good.


Better than Ever Cauliflower Pizza Crust


1  cup of cooked cauliflower “rice” (see directions below)
2 packed cups of blanched almond flour (see substitution notes below)
6 1/2  Tbs starch (Potato Starch, Tapioca or Arrowroot)
3 Tbs Whole Psyllium Husk OR Flax Meal (crust will be crispier using flax)
1 Tsp. Baking Powder
3/4 Tsp. Salt
1 1/2 Tsp. Garlic Powder
1-2 Tsp. Basil (dried or fresh)
1 1/2  Tbs Oil or Melted Butter

  1. Make your cauliflower “rice”. Use roughly 1/2 of a small fresh cauliflower and break it up- and stick it into a food processor and process  until it resembles a very fine rice- or even the size of cous-cous if you are able. Place the cauliflower into a skillet and cook with 1 tsp of oil for roughly 6-7 minutes  and stir until soft.
  2. While the “rice” is cooking preheat oven to 375 degrees.
  3. Pour the cooked cauliflower rice into a bowl and add the remaining pizza crust ingredients. Stir and then kneed until really well mixed. The dough will be thick, hold together well and may be slightly sticky.
  4. Line a baking sheet with a piece of parchment, lightly oil your hands and  then place the dough on the parchment and form a 13 inch round ( 1/4- 1/2 inch thick)  pizza crust. (It does not have to be round- nor does it have to be exactly 13 inches wide. Shape it how you want!) If the dough sticks to your hands at any point- add a little bit more oil to them.
  5. Place the prepared crust into the oven and bake 22-23 minutes or until the edges start to get slightly golden.  Remove from oven- place on toppings of choice and then bake another 15-18 minutes until your cheese (if using) has melted and the edges of the crust have gained a nice color. The longer you bake- the crispier it will be.
Store in a sealed bag or container in the freezer or fridge.


Recipe Notes and Substitutions (PLEASE READ)
  • Instead of blanched almond flour you can try using  another homemade nut or seed flour. If you opt to make sunflower seed flour I recommend using only 1/2 Tsp. of Baking powder to prevent the pizza dough from turning green. (This is a natural reaction that can happen if those two ingredients are combined improperly.) To make your own Nut or Seed flour: simply run the nut or seed of your choice in a high powdered blender or coffee grinder until you have a super fine flour. (If the flour is course- the recipe might not work as well.)
  • Coconut flour or any of the starchy grain based flours will NOT work in place of the Almond flour in this recipe (This includes all gluten free flour mixes). Only use other Nut/Seed flours as an almond exchange.
  • If you can’t have straight starch you might try using chickpea flour, millet flour, rice flour or sorghum flour as an exchange for the 6 Tbs of starch that I call for. I have not tried doing this yet- but think it may work!
  • Don’t go TOO crazy adding a ton of sauce to your pizza. As this crust ages I noticed that it stars to soak up the liquid and lose a bit of its crispness. (I believe this is due to the fact that it contains cauliflower). Use sauce in moderation. 
  • PLEASE follow these guidelines if you would like the recipe to work! Making other changes will give you different results. Experiment at your own risk.


Sunday, April 7, 2013

blueberry cashew coconut granola


granola is one of my favorite things in the world.
for the longest time, my favorite granola was my super granola.
but then, i discovered lemon blueberry granola from Winder Farms.
from that moment on, I became a lover of blueberry granola.
and this stuff right here is so amazing, you will want to make it over and over again.
i definitely have.
even though it doesn't contain lemon, it's to-die-for good.
blueberry cashew coconut granola.


top it off with almond coconut milk. 
oh yeah, so good.


we store all our cereals in plastic containers. i think cardboard cereal boxes are so tacky. i blame it on growing up in a house where there was an entire pantry dedicated to piles of cereal [boxes]. ugh. sorry, i am just a bit OCD.


guess what this weekend is? general conference weekend! i love this time of year.
granola + conference = a happy couple


Blueberry Cashew Coconut Granola

gluten-free, vegan

4 cups old-fashioned oats (certified GF)
1 to 1 1/2 cups shredded coconut (sweetened or unsweetened)
1 cup chopped cashews (almonds taste great too)
1/8-1/4 cup flax seeds
4 tablespoons brown sugar
2 teaspoons cinnamon
1/2 teaspoon salt
1/2 cup coconut oil, melted
1 cup pure maple syrup
2 teaspoons vanilla extract
1/2 teaspoon coconut extract
1/2 cup quick oats (certified GF)
1 cup dried blueberries

1. Preheat the oven to 300 degrees F. Spray a baking sheet with oil (or line with parchment paper). Set aside.

2. In a large bowl, combine oats (don't add quick oats yet), coconut, cashews, flax seeds, brown sugar, cinnamon, and salt. In a small bowl, mix together coconut oil, maple syrup, vanilla, and coconut extract. Pour coconut oil mixture over dry ingredients. Stir well. If granola seems too wet, add in the 1/2 cup quick oats. (If you don't have quick oats, just pulse 1/2 cup whole oats in food processor a few times.)

3. Pour the granola mixture onto two baking sheets. Spread granola as evenly as possible. Bake for 15-20 minutes or until granola is golden brown. Make sure to stir every 10 minutes. (I recommend undercooking it because it will continue to bake after removing it from the oven...if you wait until the granola is crunchy to remove it from the oven, it will be hurt your gums when you eat it later on--trust me.) After granola has cooled, stir in dried blueberries. Store in an air-tight container.


Tuesday, April 2, 2013

gluten-free banana bread


this banana bread is so good.

moist, soft, banana-y.

ohmahgosh. gayummm.

there's only one thing better than banana bread...

...day old banana bread.

it's so delicious.

even when it gets all soggy and moldy.

oh yeah, get some.

haha, just kidding.


Gluten-free Banana Bread


  • 2 cups gluten-free all-purpose baking flour (I use Bob's Red Mill)
  • 1 teaspoon baking soda
  • 1/4 teaspoon salt
  • 4 eggs
  • 2 cups mashed ripe bananas (about 4-5 medium ones)
  • 1 cup sugar (1/2 cup white, 1/2 cup brown)
  • 1/2 cup unsweetened applesauce
  • 1/3 cup canola oil
  • 1 teaspoon vanilla extract
  • 1 teaspoon ground cinnamon (more or less)


  1. In a large bowl, combine the flour, baking soda and salt. In a small bowl, whisk together the eggs, bananas, sugar, applesauce, oil and vanilla. Stir moist ingredients into dry ingredients, just until moistened. Stir in cinnamon.
  2. Transfer to two loaf pans (about 8-in. x 4-in. in size) coated with cooking spray (or shortening), then dusted with gluten-free flour. Bake at 350° for 45-55 minutes or until a toothpick inserted near the center comes out clean. Cool for 10 minutes before removing from pans to wire racks.


recipe found here

Related Posts Plugin for WordPress, Blogger...