Showing posts with label vegan. Show all posts

Sunday, February 21, 2016

Herbed Quinoa


It's the simple things in life.

1. Getting a new pair of jeans. (Thank you, Jessica Simpson! Seriously, these jeans are as soft as pajama bottoms and as stretchy as yoga pants. And I got them on sale for $10!)


2. Finding delicious plant-based milk. Silk Nutchello, you little devil you. I absolutely cannot live without nut milk, so finding different varieties is a beautiful surprise. I bought the toasted coconut and cashew and the dark chocolate and walnut. Talk about YUM. What I love most is that it's delicious with my Orgain protein powder or all on its own. Nom nom nom.


3. Growing out your nails. Man. It has been a SO HARD to not cut these bad boys. I usually trim my nails every few days, but I haven't cut them now for over a week and I'll tell ya, the STRUGGLE IS REAL.


4. And of course, one of the simplest things in life...eating a clean, simple dish. This Herbed Quinoa dish is just that. So easy, so straightforward, that a monkey could make it. (Well maybe not that simple. Ha.)


The hubby and I are all about quick meals during the week. Between work, travel, church callings, and sports, we are hardly ever home enough to cook a decent meal. So cooking up a big batch of this stuff--in a rice cooker to save on time--is essential. Don't get me wrong, we LOVE rice. Once I converted my husband to short-grain brown rice, he never looked back. But switching up the grain every once in a while is fun. Quinoa is my new obsession. I think I tried to order it for every meal when we were in Arizona last week. Haha. :) --- Oh, oh oh! And PLEASE, if you are ever in Glendale, Arizona--eat at the Rogue Tomato! (And order the quinoa dish, of course.) It literally opened the day before we ate there. It was super delicious. Click here for their Facebook page.


If you are feeling super awesome, sprinkle on some parmesan cheese. While I am not a big fan of cheese (stupid lactose/whey sensitivity), my body can digest parmesan okay. (Nobody likes gas, nobody.)


Herbed Quinoa

gluten-free, vegan option

serves: 4-6
time: 20 minutes


Ingredients

2 cups uncooked quinoa
4 cups liquid (chicken broth, vegetable broth, or salted water)
1/2 cup white onion, chopped
1-2 cloves garlic, minced
1 teaspoon freshly chopped thyme (or 1/4 teaspoon dried)
2 tablespoons freshly chopped parsley (or 1 teaspoon dried)
1/2 teaspoon black pepper
2 cups frozen peas, thawed in microwave and drained
+ 1/4 cup grated or powdered parmesan cheese (optional)


Directions
  1. Rinse the quinoa in a fine mesh sieve, if you are weird like that. :)
  2. Pour the quinoa and broth into the rice cooker.
  3. Stir in the onion, garlic, herbs, and pepper.
  4. Turn on your rice cooker and set it to "cook".
  5. Walk away. (Thank you, modern technology!)
  6. It should be finished in 15-20 minutes.
  7. Fluff the quinoa with a spoon and stir in the peas.
  8. Sprinkle with parmesan. 
  9. Thank me later.  ;-)


If you're curious, here is how it should look when preparing it in the rice cooker.


Basically, throw everything in the rice cooker bowl and get ready for a big bowl of...


...fluffy goodness!!


While my husband loves all animal protein...chicken, hamburger, pork, etc. I gag at the sight of it. While you could honestly eat this delicious dish all on its own, I would recommend some sort of protein-element added in. As for me, I am completely fine with drinking my favorite protein with my meal. :-)


Have a beautiful day!
<3  Sarah Lou


Saturday, February 6, 2016

Vegan Cookie Dough Fudge

Before...

After...

If those aren't the best before-and-after shots you've ever seen, then I don't know what is.
(Insert some random fitness hashtag here ... #healthy, #fitness, #progress #girlswholift)   ;-)
And you are in luck, because these before-and-afters taste A-M-A-Z-I-N-G.
Like the best-things-you-will-eat-all-day amazing.
And a bonus: you will feel-healthy-before-and-after-eating-them amazing.
Okay, enough with the hyphens.


The first time I made this recipe was 4 years ago. At that time, I was newly engaged, living in an old creaky house full of girls, and really only cared about 3 things: running, making vegan dishes, and my fiance (now husband). Life was so simple: sleep, run, school, eat, repeat. It's funny how you can't wait to grow up and be a "real adult." You don't realize that life gets more complicated--more messy--the older you get. Your goals change. I will say, however, that my goal to keep eating as vegan as possible has not changed.

Just look at that ingredient list...
  • coconut oil, dates, bananas, almonds, and oats

Real ingredients people--for real!


It's as easy as 1-2-3.
There I go again with the hyphens.


Have I mentioned that I love this cookie dough fudge? Well, I do! Nom nom noms.

If you're a fan of cookie dough--you will love these bars!
If you like the texture of fudge--you will love these bars!
If you want to indulge while still feeling wholesome--you will love these bars!
Et cetera, et cetera...


Vegan Cookie Dough Fudge

vegan, gluten-free, refined sugar-free option

Makes: 12 bars


Ingredients:

3 tablespoons coconut oil
3/4 cup Sucanat (substitute options: 1 cup honey OR 1 cup date puree)
2 tablespoons almond milk
1/2 cup mashed banana
1 teaspoon vanilla extract
1/4 teaspoon salt (to taste)
1 1/2 cups oats, ground into flour (use gluten-free oats)
1 cup raw whole almonds, ground into flour (or use 1 1/2 cups almond flour)
1/4 teaspoon cinnamon
1/2 cup dark chocolate chips


Directions:
  1. In a saucepan, heat the coconut oil over medium heat. Stir in your sweetener of choice and the almond milk. Bring that to a small boil. Reduce the heat and stir until the sweetener is dissolved (or well mixed). This should take only a few minutes. Meanwhile, mash the banana.
  2. Turn off the heat. Stir in the mashed banana, vanilla, and salt. Set this aside.
  3. In a blender or food processor, blend the oats until a flour forms. Pour this into a large mixing bowl. Next, blend the almonds in the blender or food processor. After the almonds are ground, stir them into the oat flour. Add in the cinnamon.
  4. Pour the wet mixture over the dry mixture. Stir well. At this point, the mixture should resemble...well...regular cookie dough. 
  5. Place the mixing bowl in the freezer for just 5-10 minutes, that way the chocolate chips don't melt when you stir them in later. 
  6. Remove the bowl from the freezer and stir in the chocolate chips. Try your best not to consume all the cookie dough before putting it in a pan. Trust me, you'll want to.
  7. Line an 8x8 square pan with parchment paper. Scoop the cookie dough into the pan. Smooth it out with the back of a spoon.
  8. Place the pan in the freezer for about an hour. After chilling, cut into bars. Store bars in a gallon Ziploc baggie. This fudge needs to be stored in the freezer to stay firm.


NOTES
  • If using a wet sweetener (honey or pureed dates), you may want to add 1/4 to 1/2 cup more oat flour.
  • If your dates are dry, let them soak in a small bowl of water before pureeing them.
  • This is an updated recipe from an old post from 2012. (I still love it, even after 4 years!) 
  • I love this blogger with all my heart and I have her to thank for my cookie dough fudge obsession.


Sunday, March 29, 2015

Raw Vegan Chocolate Peanut Butter Banana Pie


Nom nom nom.
These were way too fun to make.
Like really. Thoroughly enjoyable.
But even better to eat...you with my dear. ;)
Sorry, we are writing Fairy Tales in my classroom as of late, if you can't tell.


Just a little while ago, it was this beautiful girl's birthday. She turned 27. OMGAASH! She is so old!
Haha, just teasing big sis. I am turning 25 in just a few short months--which is crazy!

Anywhoozles (language from my husband, I apologize), I thought: Man oh man, I need to make something epic for this girl's big day. So I did, and it was glorious. (Insert Heavenly chorus here.)

We're talking layers of dense peanut butter cookie crust, banana soft serve, chocolate peanut butter cups, flecks of gold dust...you get the picture.


Literally.


"And it's happy to see you!" (quote from the movie Mulan)


Sorry, I couldn't resist. (Totally unintentional smile, by the way.)


Mmmm...


Chocolate Peanut Butter Banana Pie

raw, vegan, gluten-free, refined sugar-free


Base (inspired by my raw peanut butter cookies):

  • 1 cup raw, whole almonds (or almond meal)
  • 1 cup pitted medjool dates
  • ½ cup natural peanut butter
  • 1½ teaspoons pure vanilla extract 
  • couple pinches of salt (to taste)
In your food processor, blend the almonds until they resemble a coarse meal. Add the dates, peanut butter, vanilla, and salt. Process the ingredients until the mixture starts to form into a ball. This will take anywhere from 1 to 2 minutes (depending on the strength of your food processor). If it isn't coming together, add another tablespoon or two of peanut butter, stir, and process again. You can even add in a teaspoon of water. Spread at the bottom of 4 ramekins (or small glass bowls).
*Note: you will have leftover cookie dough--you can thank me later. :)


Banana Soft Serve:

  • 4 bananas
  • 2-3 tablespoons maple syrup
  • 1 teaspoon pure vanilla extract
  • a pinch of salt

Blend ingredients together until a smooth texture is reached (a food processor works just fine, or a blender if you want to wash more dishes, ha). Pour banana mixture into ramekins (or small bowls) and set in the freezer for 2 + hours.


Peanut Butter Cups:

  • 1/4 cup + 2 tablespoons coconut oil, melted
  • 1/4 cup cocoa powder
  • 2 tablespoons maple syrup
  • Peanut butter

Mix together coconut oil, cocoa powder, and maple syrup, in a small bowl. Pour chocolate mixture into the bottom of the mini cupcake liners (no need for a mini cupcake pan), just enough to cover the bottom. Set these on a plate and place in the freezer for 10 minutes. Remove from the freezer and spoon a small amount of peanut butter in the middle of the cups (a small spoonful is perfect). Pour the rest of the chocolate mixture over top of the peanut butter. Try to cover peanut butter completely. Place in the freezer for 20-30 minutes to harden the chocolate.


AND AT LAST!

Once everything is completed and ready to go, remove the ramekins and peanut butter cups from the freezer. Roughly chop the peanut butter cups. Place the peanut butter cups on top of the banana soft serve bowls. Use as many as you like. Serve and devour! :)


It was a fun day! To see pictures of the process of making this dessert, look below!


Devin pretending that our nephew Shem locked him out of the house. :)


Inspired by this recipe.
And of course by my peanut butter cookies.

Sunday, March 8, 2015

"Raw" Peanut Butter Cookies (vegan, gluten-free, dairy-free)


Okay seriously, I LOVE peanut butter. I have a slight obsession with the stuff. Sometimes after school, I come home and just dip a spoon into the jar. I deserve it---it's exhausting teaching 3rd graders! ;)

This weekend, my sister and her cute family came to visit us. It's her birthday on Wednesday and I wanted to make her something special. Both her and I are health-fanatics and don't eat the regular sweets that people enjoy on their birthdays---cake, ice cream, cupcakes, cookies, etc. I really wanted to make her something somewhat birthday-oriented, so of course my mind went straight to peanut butter! 

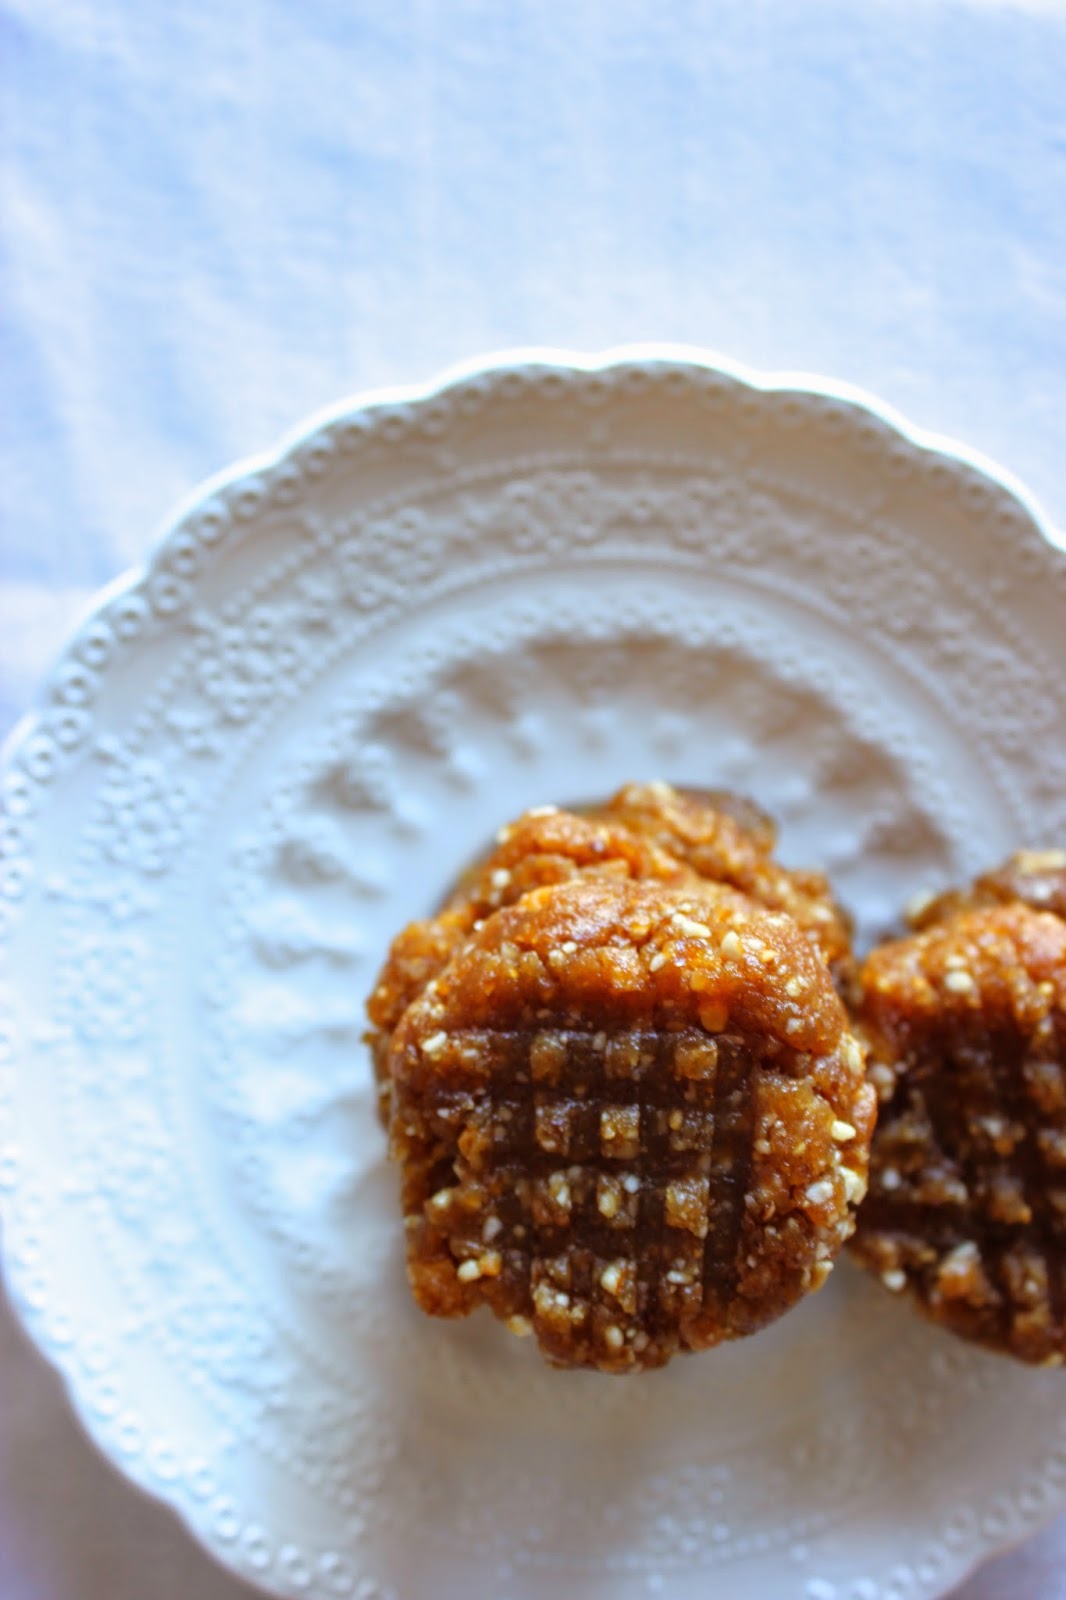
And the end result? Raw Vegan Chocolate Peanut Butter Banana Pie. (That's a mouthful. Really it was, and it was delicious.) I will post the recipe later this week. Keep an eye out for it! For the base, I made this Raw Peanut Butter Cookie Crust. I had extra so I made little peanut butter cookies with the traditional criss-cross pattern.


Raw Peanut Butter Cookies

vegan, gluten-free, dairy-free

  • 1 cup raw, whole almonds (or almond meal)
  • 1 cup pitted medjool dates
  • ½ cup natural peanut butter
  • 1½ teaspoons pure vanilla extract
  • couple pinches of salt (to taste)

INSTRUCTIONS
  1. If you are using whole almonds, process them until they resemble a coarse meal in the food processor. If you are using almond meal, simply pour the almond meal into the food processor and you can move to step two!
  2. Add the dates, peanut butter, vanilla, and salt.
  3. Process the ingredients until the mixture starts to form into a ball. This will take anywhere from 1 to 2 minutes (depending on the strength of your food processor). If it isn't coming together, add another tablespoon or two of peanut butter, stir, and process again. You can even add in a teaspoon of water. (That's what I had to do because my dates were a tad dry.)
  4. Form the dough into bite-sized balls and place on a baking sheet (or plate) covered with parchment paper. Press each ball gently with a fork to make the classic peanut butter cookie criss-cross pattern.
  5. Store in the refrigerator or freezer.


Those are my cute little peanut butter crusts just ready to be made into birthday pies!


 Thank you Sweetest Kitchen for the inspiration!

Thursday, July 3, 2014

vegan cookie dough ice cream [gluten-free, all-natural]


This ice cream dish is one of those things that you (and I) will crave all summer long.
Yes, it's really that good.


On day one, I made Vegan Cookie Dough Bites. I was like, "Holy crap, these are good."
On day two, those cookie dough bites were just begging to be made into ice cream.
And why not? Cookie dough ice cream is so good, it's like legend in the ice cream world.


It's been a long time since I have had cookie dough ice cream (at least 10 years, yes…years, folks).
You want to know how to make easy vegan ice cream? Frozen bananas, non-dairy milk, vanilla, cinnamon. Done. 
Yep, that's it.


Oh, and you may want to add in some more cookie dough bites. 
Just sayin. 


After popping it into the freezer for a little while, it will come out in perfect scoops. 


Top with homemade hard shell topping.
Perfection.


Vegan Cookie Dough Ice Cream [gluten-free]


Super Easy Vegan Ice Cream

2 to 3 frozen bananas (let them thaw for a few minutes)
1/4 cup dairy-free milk (I prefer almond milk)
2 teaspoons vanilla extract
2 dashes salt
a pinch of cinnamon (my favorite secret ingredient)
10 (or more) Vegan Cookie Dough Bites
a small handful chocolate chips (optional)

Homemade Chocolate Hard Shell Topping

1/2 cup chocolate chips (dairy-free)
1-2 tablespoons coconut oil


DIRECTIONS

  1. Put all ingredients for the ice cream in a food processor. Pulse ingredients at first, as the bananas may still be hard. After bananas have broken down a bit, process ice cream until smooth, stopping periodically to scrape down the sides. 
  2. The ice cream will be soft at this point. Pour the mixture into a small glass pan (or medium-sized bowl). I absolutely LOVE chunks of cookie dough in my cookie dough ice cream, duh! At this point, I recommend roughly chopping up additional cookie dough bites and stirring them into your ice cream. Once finished stirring, place ice cream in freezer for about 30 minutes, as you want your ice cream to be "scoopable". 
  3. While the ice cream is cooling in the freezer, make your chocolate hard shell topping. In a microwave-safe container, stir together chocolate chips and coconut oil. Melt chocolate mixture for about 30 seconds, stir, then put in for another 30 seconds. Stir until smooth.  
  4. Once ice cream is frozen, scoop out as much ice cream as your heart desires. Drizzle chocolate topping on ice cream. As soon as this chocolate topping touches the cold ice cream, it will harden just like Magic Hardshell Chocolate Topping. It's amazing!


Once again, thank you Lee Hersh, for your inspiration.
Related Posts Plugin for WordPress, Blogger...