Is
Christmas truly one week away? I can't hardly believe how fast this past year has gone. It's carazy!
Well, first things first...I must apologize for being away for so long. Last week was finals week. And right after that I got surgery. Yep, the doctor cut out my tonsils and adenoids, and these past few days have been excruciating. Today is the first day that I have felt good enough to do anything. Last night I decorated the Christmas Tree and it was exhausting...who knew stringing up decorations could be such a workout?
Me--right before my Tonsillectomy. They put a hot-air blanket on me. It was so WARM and TOASTY. I
loved it.
P.S. This was my first experience with
anesthesia. I felt like a zombie. I also remember feeling like I was floating up from my bed. That was pretty cool.
P.P.S. I was going to post a picture of my throat after the surgery, but I don't want to make any of you sick. (Yeah, it's that nasty.) But if you are really curious, just check out my Facebook...it's there in all its glory.
Confession: My little brother went running last night in the snow, and I so badly wanted to go running as well. It's been about 3 days since my last run and I am starting to have running withdrawals. Pretty pathetic, I know. I miss these:
But for now I am have to stick with these:
And this:
Ugh. I absolutely HATE Percocet. It makes me nauseous and dizzy. After throwing up and fainting for the first few days, I decided to stop taking it. Sure, I have more pain now, but I would take pain over nausea and fainting spells any day! Good riddance!
On the bright side, I decided to post something delicious today. (Haha, and NOW I post the recipes after-the-fact.)
Nonetheless, I am so hungry from not being able to eat to my heart's content (darn this stupid surgery). Plus I have wanted to post these pie recipes for a while now, so here ya go.
Maple Pumpkin Pie
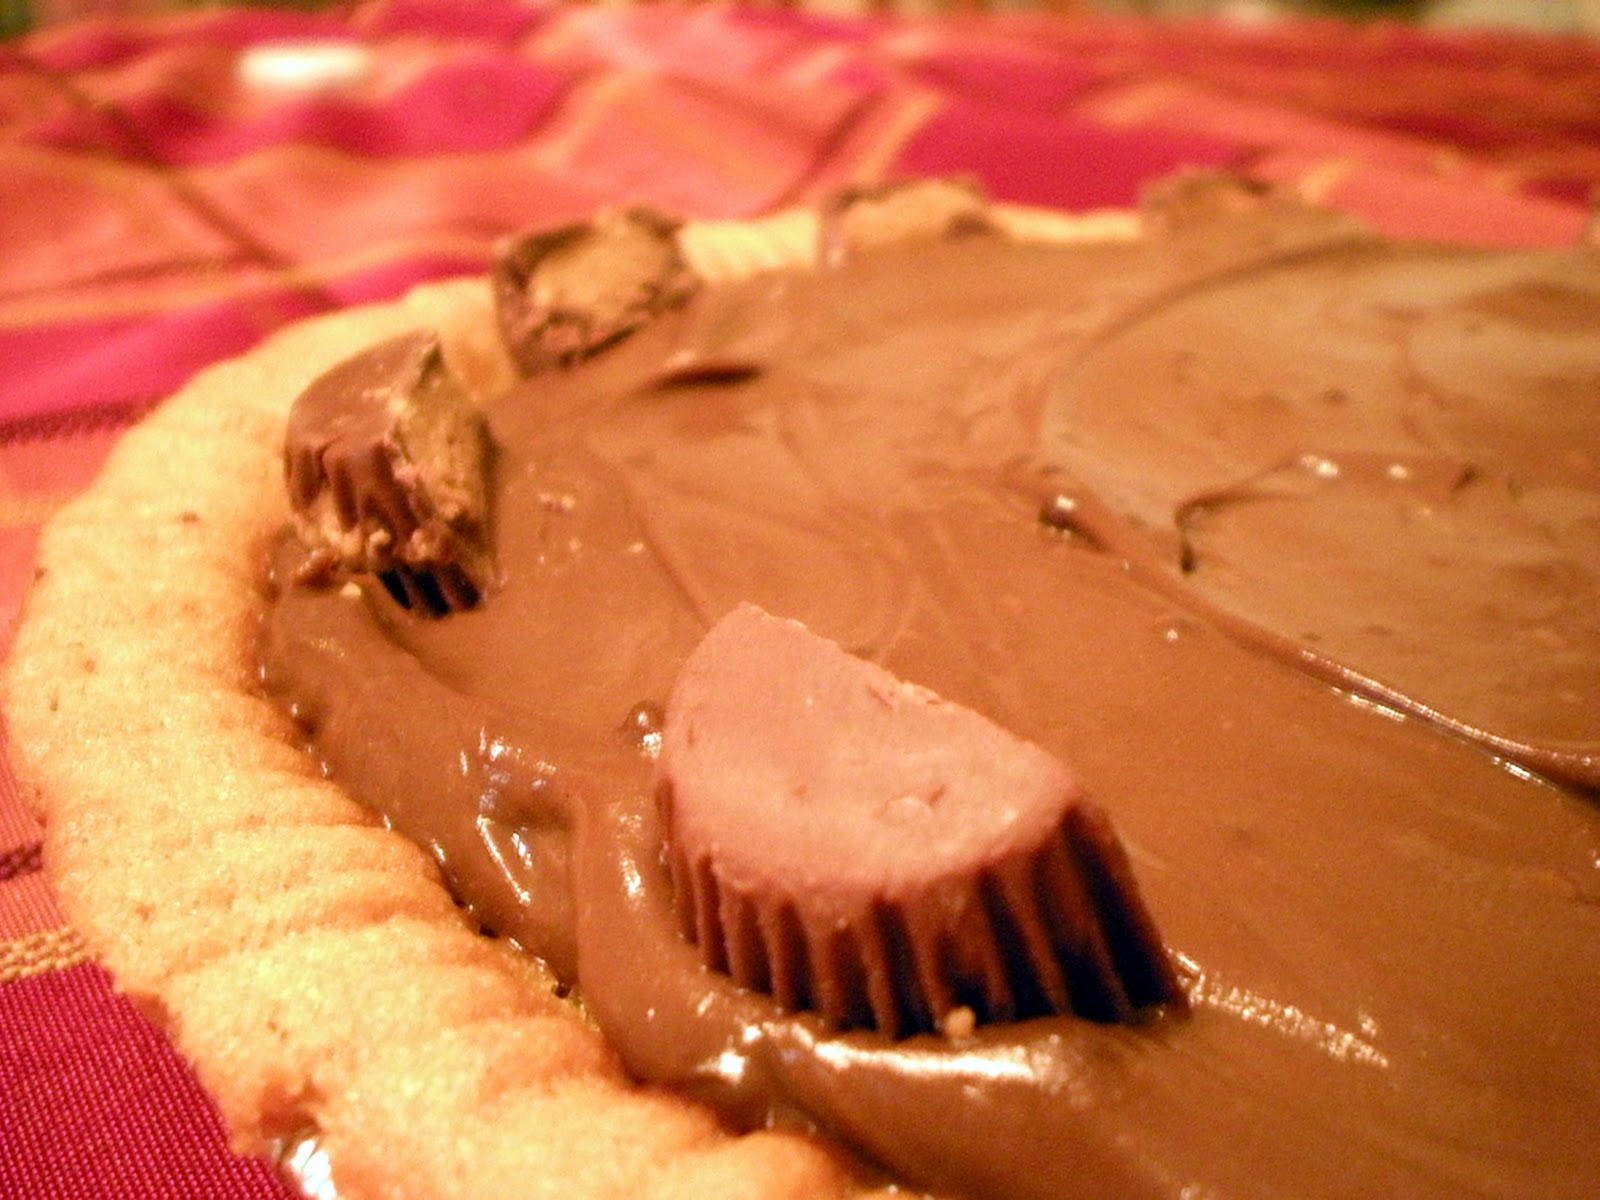
Peanut Butter Cup Cookie Pie
Banana Cream Pie
Strawberry Rhubarb Pie
Sugar and Spice Apple Pie
Oh for the stars, so many pies!
Okay, well I just have to start with my absolute favorite pie in the WORLD!
Banana Cream Pie.
Nothing beats it. Nothing, I tell you.
Banana Creamy Dreamy Pie
adapted from Food.com
- 1 (9-inch) graham cracker pie shell
- 3 cups whole milk
- 3/4 cup white sugar
- 1/3 cup all-purpose flour
- 1/4 teaspoon salt
- 3 egg yolks, slightly beaten
- 2 tablespoons butter
- 1 teaspoon vanilla
- 3 bananas
- In a large saucepan, scald the milk.
- In another saucepan, combine the sugar, flour and salt; gradually stir in the scalded milk.
- Over medium heat, stirring constantly, cook until thickened.
- Cover and, stirring occasionally, cook for two minutes longer.
- In a small bowl, have the 3 egg yolks, slightly beaten, ready; stir a small amount of the hot mixture into beaten yolks; when thoroughly combined, stir yolks into hot mixture.
- Cook for one minute longer, stirring constantly.
- Remove from heat and blend in the butter and vanilla.
- Let sit until lukewarm.
- When ready to pour, slice 2 bananas and scatter in pie shell; pour warm mixture over bananas.
- Let the pie cool until serving.
- Top with homemade whipped cream and remaining banana (sliced).
Eat and die happy :)
Oh and now our next contender...the Peanut Butter Cookie Chocolate Cream Pie.
Such a mouthful.
Peanut Butter Cup Cookie Pie
- 1/2 cup all-purpose flour
- 1/2 teaspoon baking soda
- 1/16 teaspoon salt (about a pinch)
- 1/4 cup packed light brown sugar
- 2 tablespoons sugar
- 4 tablespoons unsalted butter, cold, cut into 1-inch cubes
- 1/2 cup smooth peanut butter, at room temperature
- 1/2 large egg (beat the egg lightly before measuring out half of it)
- 1/4 teaspoon vanilla extract
- In a small bowl, whisk together the flour, baking soda, and salt.
- If using a food processor: In a food processor with the metal blade, process the sugars for several minutes or until very fine. With the motor running, add the butter cubes. Add the peanut butter and process until smooth and creamy, about 10 seconds. With the motor running, add the egg and vanilla and process until incorporated. Scrape the sides of the bowl. Add the flour mixture and pulse just until incorporated.
- If using an electric mixer: In a mixing bowl, beat the sugars until well mixed. Add the butter (you’ll need to softened it slightly) and peanut butter and beat for several minutes on medium-high speed until very smooth and creamy. Add the egg and vanilla and beat until incorporated, scraping the sides of the bowl. Reduce sped to low and gradually beat in the flour mixture just until incorporated.
- Scrape the dough into a bowl and refrigerate for at least 1 hour or up to overnight.
- Press the dough evenly into a tart pan (or a pie pan--that's what I did). (It is a little more challenging, but faster and neater to roll the dough out between sheets of plastic wrap to about 1/16 to 1/8 inch thickness and 11 1/2 inches in diameter. Remove one piece of plastic, invert the dough into the tart pan, and gently ease the edge of the dough inside the pan so that the sharp top surface does not cut it off.) Use a piece of plastic wrap to gently and evenly press the dough into the pan, pressing it against the sides. If the dough softens and sticks, refrigerate it until the plastic wrap doesn’t stick. If the dough tears, simply press it together or use the scraps to press into any empty areas. Cover the tart pan with plastic wrap and refrigerate for at least 1 hour or up to 1 week. (You can wrap the unbaked crust well and freeze it for up to 3 months.)
- Bake the tart shell in a preheated 375°F oven for 10 to 12 minutes, or until golden. It will puff at first and then settle down toward the end of baking. The sides will be soft but spring back when touched gently with a finger. Cool on a wire rack.
- 2 cups whole milk
- 1/2 cup sugar
- 1/3 cup natural cocoa powder
- 4 teaspoons cornstarch
- 3 large egg yolks
- 2 teaspoons pure vanilla extract
- 1/4 teaspoon fine salt
- 3/4 cup whipping cream
- Put 1 1/2 cups of the milk, the sugar, and the cocoa in a nonreactive saucepan. Bring to a simmer, over medium-high heat. Remove from the heat.
- Meanwhile, whisk the remaining 1/2 cup of the milk, cornstarch, salt, egg yolks, and vanilla in a bowl. Gradually whisk the hot milk into the egg mixture. Return to the saucepan and cook over medium-high heat whisking constantly, until the pudding comes to a full boil. Reduce the heat to maintain a simmer, and continue whisking until thick, about 2 or 3 minutes more.
- Pour the pudding into 6 small cups. Cover with plastic wrap and refrigerate for at least 4 hours or ideally overnight until set.
- Just before serving pour the cream into a chilled bowl. Whip the cream with a whisk or a hand held mixer, and continue beating until soft peaks form. Take care not to over-beat the cream or it will be grainy. Serve each pudding with a dollop of whipped cream on top.
For the rest of the pie...
- In the peanut butter cookie pie shell, place about 1 cup chopped Reese's peanut butter cups.
- Fill remainder of pie with chocolate filling.
- Garnish with chocolate shavings or peanut butter cup pieces.
- Cool until ready to serve.
This next pie is the
BEST pumpkin pie, hands down. I made it last year for Thanksgiving and I couldn't resist making it again this year.
Pure maple. No added sugar.
A definite crowd-pleaser.
Pure Maple Pumpkin Pie
created by myself :)
- 1 1/2 cups pumpkin puree
- 1 1/4 teaspoons ground cinnamon
- 1 teaspoon ground ginger
- 1 teaspoon ground nutmeg
- 1/4 teaspoon ground cloves
- 1/8 teaspoon ground allspice
- 1/2 teaspoon salt
- 2/3 cup real maple syrup (feel free to add in more, sweeten to your liking)
- 1 cup almond milk (you can use cow's milk, if you want)
- 2 tablespoons flour (if making a gluten-free pie, sub-in cornstarch)
- A pinch of cornstarch
- 3 eggs
- 1 (9 inch) unbaked pie shell
- Preheat oven to 350 degrees F.
- In a large bowl, mix together pumpkin, cinnamon, ginger, nutmeg, cloves, allspice, and salt. Stir in maple syrup, milk, flour, and cornstarch. Mix in eggs one at a time. Pour filling into unbaked pie shell.
- Bake for 1 hour, or until center is set.
I made a "baby" pumpkin pie with the leftovers...so cute.
Have you ever had a strawberry-rhubarb pie? If not, you are missing out.
Unfortunately this time around, my classic strawberry-rhubarb pie didn't set. (I blame it on my lack of sleep...) But I am going to post the recipe anyway because it's delicious, I promise :)
Strawberry Rhubarb Pie
- 2 (9-inch) unbaked pie crusts
- 2 1/2 cups chopped red rhubarb, fresh
- 2 1/2 cups de-stemmed, washed and cut strawberries (in larger pieces)
- 1 1/2 cups sugar (1 1/4 cups for high altitude)
- 2 tablespoons minute tapioca
- 1 tablespoon all-purpose flour
- 1/2 teaspoon lemon zest
- 1/2 teaspoon lemon juice
- 1/2 teaspoon ground cinnamon
- 1 teaspoon vanilla extract
- 3 tablespoons butter, cubed small
- 1 egg white beaten with 1 teaspoon water
- White granulated sugar
- Mix the rhubarb, strawberries, sugar, tapioca, flour, zest and juice of lemon, dash of cinnamon, and vanilla. Mix well in a large bowl and pour out into bottom crust.
- Dot the top of the filling with the butter. Brush edges of pie crust with egg white wash.
- Roll out the other piece of dough and place over filling. Crimp to seal edges. Brush with egg white wash and sprinkle with white (granulated) sugar.
- Collar with foil and bake at 425 degrees F for 15 minutes. Decrease temperature to 375 degrees F and bake for an additional 45 to 50 minutes, or until the filling starts bubbling.
Last and final pie: sugar and spice and everything nice...
Sugar and Spice Apple Pie
adapted from an assortment of recipes
- 2 (9-inch) pie crusts
- 1/2 cup butter
- 3 tablespoons all-purpose flour
- 1/4 cup water
- 1/2 cup white sugar
- 1/2 cup packed brown sugar
- 1 teaspoon ground cinnamon
- 1/4 teaspoon ground nutmeg
- 1/8 teaspoon ground cloves
- 1 teaspoon vanilla
- 8 Granny Smith apples - peeled, cored and sliced
- 2 egg whites
- Cinnamon-sugar
- Preheat oven to 425 degrees F (220 degrees C). Melt the butter in a saucepan. Stir in flour to form a paste. Add water, white sugar and brown sugar, and bring to a boil. Reduce temperature and let simmer.
- Stir in spices and vanilla.
- Place the bottom crust in your pan. Fill with apples, mounded slightly. Pour the sugar mixture over the apples.
- Cover that with a lattice-style crust. Brush with egg whites and sprinkle with cinnamon-sugar.
- Bake 15 minutes in the preheated oven. Reduce the temperature to 350 degrees F. Continue baking for 35 to 45 minutes, until apples are soft.
Golden, flaky crust...nom nom nom.
My cute little nieces had their birthdays: Emma and Addie.
Oh, and two of my brothers also had their birthdays: Isaac and Lon. Not to mention, two more of my brothers have November birthdays: Stuart and Nathan.
My parents must have been really bored in the springtime.
Chao folks, I gotta go take some pain-killers!
Questions of the Day:
Have you ever had surgery? If so, on what?
What is your favorite kind of pie? (mine is banana cream, all the way...yummm.)