Showing posts with label peanut butter. Show all posts

Wednesday, April 29, 2015

S'mores Protein Balls


I HATE s'mores. Always have, always will. Whenever I was at a summer bonfire and someone said, "Who wants s'mores?" I was the party-pooper. Seriously. Who wants to eat a gooey, hot mess of chocolate and marshmallow sticking all over your hands? Okay, I understand how that sounds appetizing to some (maybe even most) people...but GROSS!


That is exactly why when I saw this the other day, I was skeptical. Maybe even a little perturbed. Who thinks that a s'more would ever be tasty as a protein ball? LIKE REALLY?! But since my husband is currently obsessed with me getting enough protein in my diet, I thought, What do I have to lose by making these? (Other than my precious chocolate chips, haha.)


Well, I will tell you what...I was WRONG! Sorry s'mores protein ball gods for ever doubting your wisdom! First bite turned into first love, which turned into obsession. I promise that if you make these, you will LOVE them! (Yikes, they better be as good as I think they are...)


S'mores Protein Balls

no bake, gluten free, low sugar, high protein


Ingredients

1 1/4 cups rolled oats (gluten free)
1/2 cup oat flour (gluten free, you can simply grind oats in a blender)
1/2 cup gluten free graham cracker crumbs (or any neutral tasting gluten free cereal)
1/2 tsp salt
1 1/2 cups vanilla protein powder
1 1/4 cup creamy nut butter of choice (I used peanut butter)
1/4 cup honey
1/4 cup milk of choice (I used almond milk)
1/4 cup mini marshmallows
1/4 cup chocolate chips (dark or milk chocolate)

Instructions

  1. In a large bowl, combine oats, oat flour, graham cracker (or cereal) crumbs, protein powder, and salt. Set aside.
  2. In a small bowl, combine nut butter and honey. Microwave for about 1 minute or until melted.
  3. Stir together wet mixture and dry mixture. Once this is well combined, add in milk.
  4. Slowly stir in mini marshmallows and chocolate chips. (You may want to let the mixture cool down for 1-2 minutes before, as the marshmallows and chocolate may begin to melt.)
  5. Form mixture into bite-sized balls, in the palm of your hand.
  6. Store balls in a gallon baggie. You can place these either in the refrigerator or freezer. Personally, I like storing them in the freezer because they last longer and are easier to store.
Makes about 24 balls.
Nutrition Information (per ball)
Protein: 8g       Sugar: 4g       Fat: 8g       Calories: 130


Sunday, March 29, 2015

Raw Vegan Chocolate Peanut Butter Banana Pie


Nom nom nom.
These were way too fun to make.
Like really. Thoroughly enjoyable.
But even better to eat...you with my dear. ;)
Sorry, we are writing Fairy Tales in my classroom as of late, if you can't tell.


Just a little while ago, it was this beautiful girl's birthday. She turned 27. OMGAASH! She is so old!
Haha, just teasing big sis. I am turning 25 in just a few short months--which is crazy!

Anywhoozles (language from my husband, I apologize), I thought: Man oh man, I need to make something epic for this girl's big day. So I did, and it was glorious. (Insert Heavenly chorus here.)

We're talking layers of dense peanut butter cookie crust, banana soft serve, chocolate peanut butter cups, flecks of gold dust...you get the picture.


Literally.


"And it's happy to see you!" (quote from the movie Mulan)


Sorry, I couldn't resist. (Totally unintentional smile, by the way.)


Mmmm...


Chocolate Peanut Butter Banana Pie

raw, vegan, gluten-free, refined sugar-free


Base (inspired by my raw peanut butter cookies):

  • 1 cup raw, whole almonds (or almond meal)
  • 1 cup pitted medjool dates
  • ½ cup natural peanut butter
  • 1½ teaspoons pure vanilla extract 
  • couple pinches of salt (to taste)
In your food processor, blend the almonds until they resemble a coarse meal. Add the dates, peanut butter, vanilla, and salt. Process the ingredients until the mixture starts to form into a ball. This will take anywhere from 1 to 2 minutes (depending on the strength of your food processor). If it isn't coming together, add another tablespoon or two of peanut butter, stir, and process again. You can even add in a teaspoon of water. Spread at the bottom of 4 ramekins (or small glass bowls).
*Note: you will have leftover cookie dough--you can thank me later. :)


Banana Soft Serve:

  • 4 bananas
  • 2-3 tablespoons maple syrup
  • 1 teaspoon pure vanilla extract
  • a pinch of salt

Blend ingredients together until a smooth texture is reached (a food processor works just fine, or a blender if you want to wash more dishes, ha). Pour banana mixture into ramekins (or small bowls) and set in the freezer for 2 + hours.


Peanut Butter Cups:

  • 1/4 cup + 2 tablespoons coconut oil, melted
  • 1/4 cup cocoa powder
  • 2 tablespoons maple syrup
  • Peanut butter

Mix together coconut oil, cocoa powder, and maple syrup, in a small bowl. Pour chocolate mixture into the bottom of the mini cupcake liners (no need for a mini cupcake pan), just enough to cover the bottom. Set these on a plate and place in the freezer for 10 minutes. Remove from the freezer and spoon a small amount of peanut butter in the middle of the cups (a small spoonful is perfect). Pour the rest of the chocolate mixture over top of the peanut butter. Try to cover peanut butter completely. Place in the freezer for 20-30 minutes to harden the chocolate.


AND AT LAST!

Once everything is completed and ready to go, remove the ramekins and peanut butter cups from the freezer. Roughly chop the peanut butter cups. Place the peanut butter cups on top of the banana soft serve bowls. Use as many as you like. Serve and devour! :)


It was a fun day! To see pictures of the process of making this dessert, look below!


Devin pretending that our nephew Shem locked him out of the house. :)


Inspired by this recipe.
And of course by my peanut butter cookies.

Sunday, March 8, 2015

"Raw" Peanut Butter Cookies (vegan, gluten-free, dairy-free)


Okay seriously, I LOVE peanut butter. I have a slight obsession with the stuff. Sometimes after school, I come home and just dip a spoon into the jar. I deserve it---it's exhausting teaching 3rd graders! ;)

This weekend, my sister and her cute family came to visit us. It's her birthday on Wednesday and I wanted to make her something special. Both her and I are health-fanatics and don't eat the regular sweets that people enjoy on their birthdays---cake, ice cream, cupcakes, cookies, etc. I really wanted to make her something somewhat birthday-oriented, so of course my mind went straight to peanut butter! 

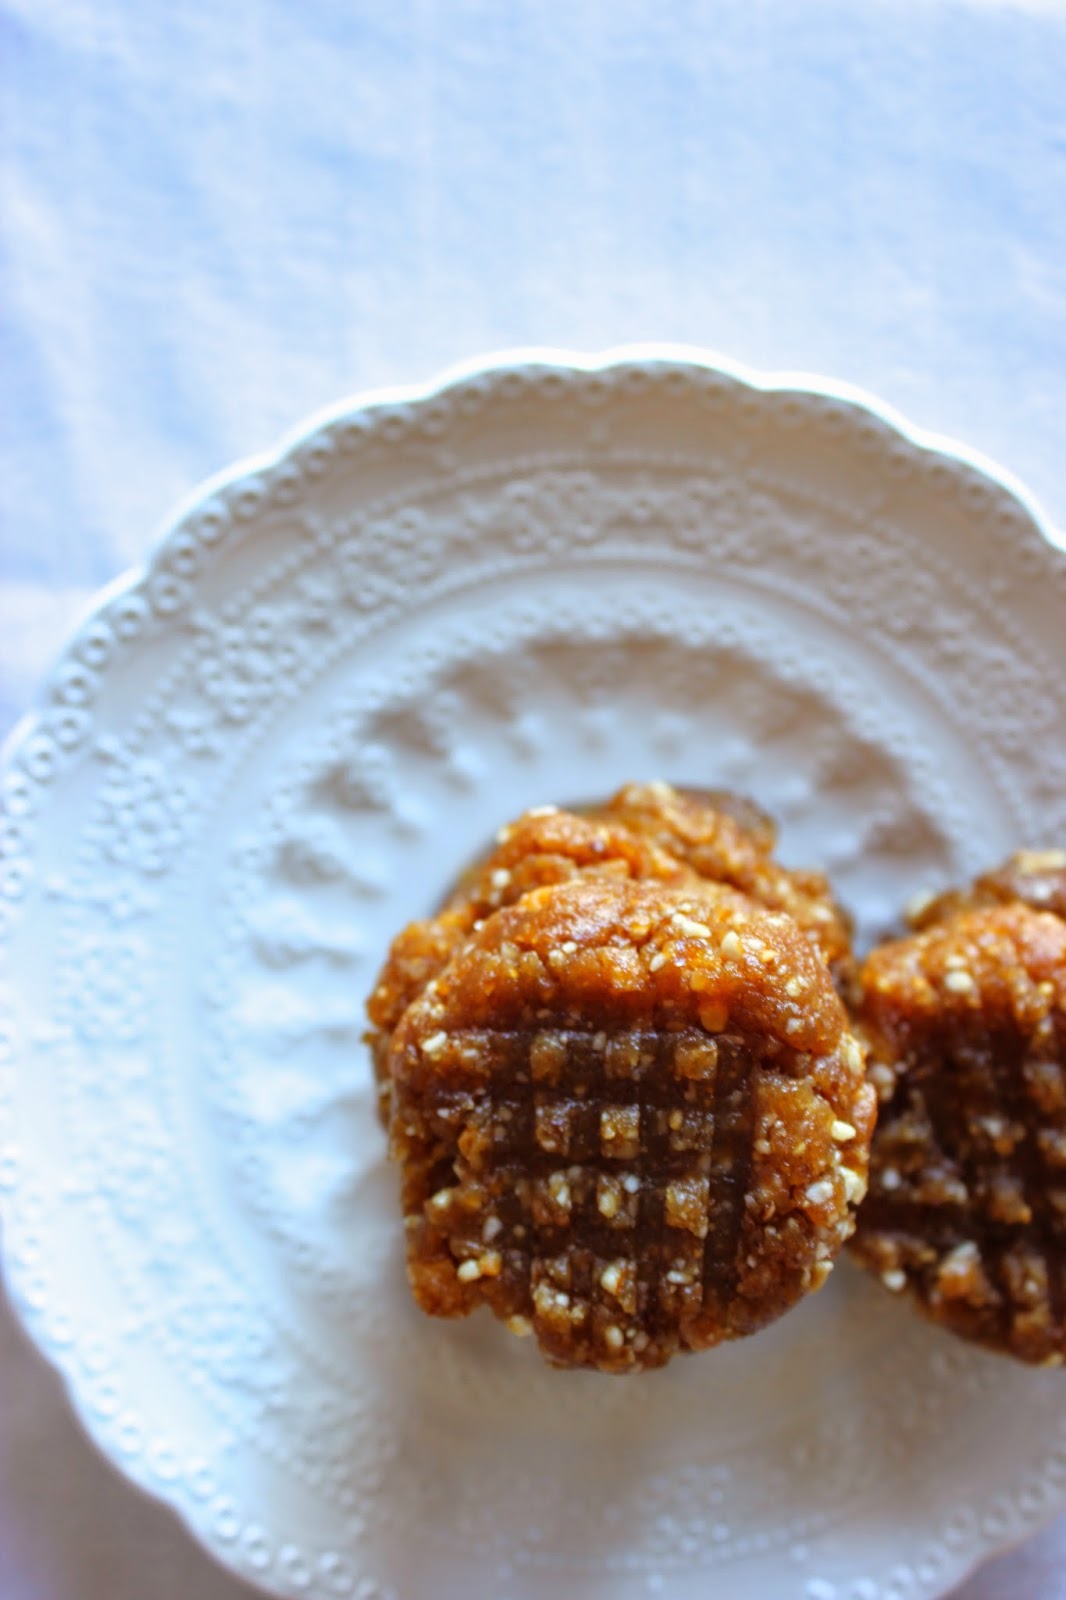
And the end result? Raw Vegan Chocolate Peanut Butter Banana Pie. (That's a mouthful. Really it was, and it was delicious.) I will post the recipe later this week. Keep an eye out for it! For the base, I made this Raw Peanut Butter Cookie Crust. I had extra so I made little peanut butter cookies with the traditional criss-cross pattern.


Raw Peanut Butter Cookies

vegan, gluten-free, dairy-free

  • 1 cup raw, whole almonds (or almond meal)
  • 1 cup pitted medjool dates
  • ½ cup natural peanut butter
  • 1½ teaspoons pure vanilla extract
  • couple pinches of salt (to taste)

INSTRUCTIONS
  1. If you are using whole almonds, process them until they resemble a coarse meal in the food processor. If you are using almond meal, simply pour the almond meal into the food processor and you can move to step two!
  2. Add the dates, peanut butter, vanilla, and salt.
  3. Process the ingredients until the mixture starts to form into a ball. This will take anywhere from 1 to 2 minutes (depending on the strength of your food processor). If it isn't coming together, add another tablespoon or two of peanut butter, stir, and process again. You can even add in a teaspoon of water. (That's what I had to do because my dates were a tad dry.)
  4. Form the dough into bite-sized balls and place on a baking sheet (or plate) covered with parchment paper. Press each ball gently with a fork to make the classic peanut butter cookie criss-cross pattern.
  5. Store in the refrigerator or freezer.


Those are my cute little peanut butter crusts just ready to be made into birthday pies!


 Thank you Sweetest Kitchen for the inspiration!

Friday, February 20, 2015

Peanut Butter Snowballs


This weekend it's supposed to snow. A lot...apparently. ;)
Snow--please make your way to Wyoming! This girls needs to go snowboarding.


Even if the lack of snow prevents me from hitting the slopes, I will not let it stop me from making Peanut Butter Snowballs! Not on your life.

I found this recipe in a magazine this winter. And I am so glad I did. It has been the hit of many parties. But don't you fret, I "healthified" it. :)


Peanut Butter Snowballs

gluten-free, can be dairy-free


What you need:
  • 1 cup all-natural peanut butter (salted)
  • 1/4 to 1/3 cup honey, melted (adding more honey will hold mixture together better)
  • 1 teaspoon vanilla
  • 1/2 teaspoon coconut oil, melted
  • 1 cup chocolate chips of choice
    • white chocolate chips for "snowball" look
    • semi-sweet chocolate chips for dairy-free option
    • half milk chocolate & semi-sweet chocolate for pure deliciousness


What you do:
  1. In a bowl, combine peanut butter and honey. Stir in vanilla.
  2. Take a spoonful of peanut butter mixture and roll into a ball. Place on a baking sheet covered with wax/parchment paper. Repeat this process until all of the peanut butter mixture is gone.
  3. Place baking sheet in freezer for about 20 minutes, until peanut butter balls are firm.
  4. In a double-boiler, melt together chocolate chips with coconut oil, over medium heat. Stir until smooth. (Don't skip adding in the coconut oil, it is essential for all over melting and effective covering of the peanut butter balls.)
  5. Remove baking pan from freezer. Take a peanut butter ball and roll it in the melted chocolate, (with a spoon) until completely covered. Place peanut butter ball back onto the wax/parchment-covered baking sheet. Repeat this process until all peanut butter balls are covered. Place pan back into the freezer for about 20 minutes.
  6. Once "snowballs" are firm, remove pan from freezer and place balls in Ziploc baggies. Store in the fridge or freezer until you are ready to chow down!
NOTE: If you use another type of peanut butter, such as Jiffy/Skippy--you will need to add in a few tablespoons of powdered sugar to "firm up" the peanut butter mixture. If you skip this step, you will end up with a gooey mess.


As you can see, these Peanut Butter Snowballs have been quite the party animals. Once you start making them, they will be requested by everyone. Trust me.


Similar to these guys: Healthy Reese's Peanut Butter Eggs

Sunday, February 10, 2013

homemade [healthy] Reese's peanut butter eggs


After church today, Devin and I were delivering Valentines to our cute little primary kids.
One student's family raises chickens in their backyard, and they gave us some fresh eggs.
I was so excited!
Aren't they pretty?!
I love fresh eggs. The flavor, the color...they're magical.

Almost as magical as homemade Reese's peanut butter eggs.


Remember these?
I loved them as a kid.

These cute little things are healthy and super tasty.
In my opinion, they're better than the original ones.
But then again, you can't go wrong with peanut butter and chocolate. :)


Homemade Reese's Peanut Butter Eggs

  • 1 cup all-natural peanut butter (salted)
  • 1/4 to 1/3 cup honey, melted (adding more honey will hold mixture together better)
  • 1 teaspoon vanilla
  • a generous dash of cinnamon (trust me, it's essential)
  • 1 cup chocolate chips (milk chocolate or semi-sweet, I did 1/2 cup of each)

In a bowl, combine peanut butter and honey. Stir in cinnamon and vanilla.

Take a spoonful of peanut butter mixture and roll into an egg-shaped ball. Place on a baking sheet covered with wax paper. Repeat this process until all the peanut butter mixture is gone.

Place baking sheet in freezer for about 20 minutes, until peanut butter balls are firm.

In another bowl, melt the chocolate chips in the microwave. Make sure to stir chocolate every 30 seconds to prevent it from burning.

Remove baking pan from freezer. Take a peanut butter ball and roll it in the melted chocolate, with a spoon, until completely covered. Place peanut butter egg back onto the wax-covered baking sheet. Repeat this process until all peanut butter balls are covered. Place pan back into the freezer for about 20 minutes.

Take out pan, place peanut butter eggs in baggies, and store in the fridge.

Try not to eat all of them in one sitting :)


Saturday, February 2, 2013

trail mix granola bars


I have been obsessed with granola bars lately.
I feel like I could never get sick of them.
But if you ask my husband, I think he would disagree with me.


When I bake, I like to experiment with the results.
This time I delivered the granola bars to two different groups of people.
They were a hit.
With both groups.
I guess that makes this recipe a keeper :)


Trail Mix Granola Bars

gluten-free & sugar-free

  • 3 1/2 cups gluten-free crispy rice cereal
  • 3 cups gluten-free Chex cereal (rice or corn)
  • 1 1/2 cups raisins
  • 1/2 cup sunflower seeds
  • 1/2 cup peanuts (dry-roasted)
  • 1 cup honey
  • 1 1/4 cups peanut butter
  • 1 teaspoon vanilla


Combine both cereals with the raisins, sunflower seeds, and peanuts in a large bowl.

In a small bowl, combine the honey and peanut butter. Heat in the microwave for about one minute. Stir in the vanilla.

Pour this over the cereal mixture and mix well.

Pour granola mixture into a sprayed 9x13 baking pan. Press granola into the pan with all your might. Place pan in the freezer and allow to cool for about 30 minutes. 

Cut into bars.

Devour.


A big thank you to my lovely sister Yvonne for this idea.
The original recipe can be found here.
Related Posts Plugin for WordPress, Blogger...