Tuesday, May 3, 2011

Cinco de Mayo--Salsa

For as long as I can remember, I always thought that salsa was meant to be chunky. I was happy buying the classic Pace salsa: jarred, chunky, and as unauthentic as you can get. But recently, I discovered that true Mexican salsa is more blended. I like to compare American salsa and Mexican salsa with peanut butter. Americanized salsa is like chunky peanut butter and Mexican salsa is like smooth peanut butter. Both consist of the same ingredients, but are prepared in different ways. The first experience I had with real salsa was in Oregon, when a friend made Tomatillo salsa. I was hooked at first bite. It was spicy yet sweet, and smooth yet not overly blended. 
And what is salsa without tortilla chips? My favorite brand is Santitas. (Plus they are usually the cheapest of all the brands--thank you grocery stores!) 
However, I must share with you my recent discovery and infatuation with homemade baked tortilla chips. Baked, spicy, crunchy--gah, so good! Okay, enough with my ranting and on with the recipes!

Authentic Salsa
Yield: About 6 cups (AKA a ginormous batch)

  • 28-ounce can whole tomatoes (peeled) with juice
  • 2 10-ounce cans Rotel (diced tomatoes with green chilies)
  • ¼ cup chopped onion
  • 1 clove garlic, chopped
  • 1 jalepeƱo, quartered and sliced thin
  • ½ cup cilantro
  • Juice from ½ a fresh lime 
  • ¼ teaspoon salt
  • ¼ teaspoon granulated sugar
  • ¼ teaspoon ground cumin

  1. Add all ingredients to a food processor. Pulse until you get desired consistency. Refrigerate for at least one hour, and then serve with your favorite tortilla chips.
  2. Note: This makes a large quantity, so you may have to work in batches.
  3. Another note: If you prefer a milder salsa, remove the seeds from the jalapeno.
Pico de Gallo (salsa, but not really)
  • 2 cups tomatoes, seeded and chopped
  • 1/4 cup green bell pepper, chopped
  • 1/4 cup onion, chopped
  • 1 jalapeno, seeded and chopped
  • 1 clove garlic, minced
  • 1 lime, juiced
  • 1 handful cilantro, chopped
  • cumin to taste
  • salt and pepper to taste 
  1. Mix everything in a bowl. Yep, that's it.
Tomatillo Salsa
  • 5 large tomatillos, about 2.5 pounds
  • 2 medium Vidalia onions, sliced
  • 4 cloves garlic, peeled
  • 1 jalapeno or habanero pepper
  • 1 teaspoon salt
  • 1/2 teaspoon pepper
  • 3 tablespoons cilantro leaves
  • 1 avocado
  1. Preheat oven to 375°F.
  2. Place tomatillos, onions, garlic cloves, and jalapeno (or habanero) into a small roasting pan, sprinkle with salt and pepper. Roast at 375°F for 1 hour, until the vegetables have released their juices and the tomatillos are slightly browned. Place cilantro into a food processor and pour in cooked tomatillo mixture. Puree the mixture, adjust seasonings if necessary. Add in the avocado and puree a bit more. 
  3. Note: You can either roast your veggies or puree them raw.
Baked Tortilla Chips
  • corn or flour tortillas
  • spices: salt, pepper, garlic, cumin, basil, chili powder, cayenne pepper, etc.
  1. Preheat oven to 400 degrees F.
  2. Lay the tortillas on a cutting board. Stack in a pile. Slice tortillas with a knife, cutting into 4-8 equal triangles (cut like you would a round pizza).
  3. Arrange tortilla triangles in a single layer on baking sheets. Lightly spray with vegetable or olive oil (optional). Sprinkle with spices. Bake for about 6-7 minutes until crisp and the edges start to curl and turn slightly brown. Watch chips carefully after 5 minutes because they can burn easily. 
  4. Once chips are done, removed from the oven to cool. They will continue to crisp as they cool.

 Oh yeah, I almost forgot! Since Cinco de Mayo is just a day away, I thought that I would share this with you. If you are wondering, this is the t-shirt that I will be wearing on May 5, 2011. Yes, there are 5 jars of Mayo on my t-shirt. Isn't it fantastic? Haha :)  Also, Cinco de Mayo is the same day as my best friend's birthday. So Happy Birthday Carl. Think of me when you eat salsa (and Mayo).

Sunday, May 1, 2011

The Whiteout Cake (Vanilla Cake with White Chocolate Frosting)


I have an obsession. It's a chocolate obsession. Any type of chocolate: dark, milk, white. You name it, I like it.  A couple weeks ago, I went to a dessert cafe called The Chocolate. Walking in was like entering a state of euphoria. Cakes, cupcakes, cookies, tarts, and pastries hide behind glass cases. Desserts so beautiful they make your mouth water in anticipation. I ordered the Kitty Katrina: a divine vanilla cake layered with fruit filling and topped with whipped vanilla buttercream. I fell in love. Since then, I have been determined to make my own whiteout cake. I based my recipe from the cookbook, Baked: New Frontiers in Baking, which was featured on the website, Sweetapolita.

This cake is simple to make, although it has some unique qualities: it calls for ice cold water (as opposed to the more common room temperature milk) and a combination of cake flour and all-purpose (which I think is a perfect blend). The cake baked up beautifully and made the entire house smell like warm vanilla. My favorite part was the white chocolate frosting. Aside from being different from anything I’ve ever made, it whips up smooth, creamy, and satiny–the ultimate texture for frosting and decorating. I topped it all off with a Lindt white chocolate truffle.

 Ivory
 Window light
 Truffle
 Swirl
 Inside lies the golden treasure...
Layers of delight

The Whiteout Cake

For the white cake layers:
  • 2 1/2 cups of cake flour
  • 3/4 cup all-purpose flour
  • 1 tablespoon baking powder
  • 1 teaspoon baking soda
  • 3/4 teaspoon salt
  • 1/2 cup (1 stick) unsalted butter, softened
  • 1/2 cup vegetable shortening
  • 1 3/4 cups sugar
  • 1 tablespoon pure vanilla extract
  • 1 large egg
  • 1 1/2 cups ice cold water
  • 3 large egg whites, at room temperature
  • 1/4 teaspoon cream of tartar

For the white chocolate frosting:
  • 6 ounces white chocolate, coarsely chopped
  • 1 1/2 cups sugar
  • 1/3 cup all-purpose flour
  • 1 1/2 cups milk
  • 1/3 cup heavy cream
  • 1 1/2 cups (3 sticks) unsalted butter, soft but cool, cut into small pieces
  • 1 teaspoon pure vanilla extract
  • To assemble the cake
  • White sprinkles/nonpareils or white chocolate shavings/truffles

Make the white cake layers:
  1. Preheat the oven to 325 degrees F. Butter three 8-inch round cake pans, line the bottoms with parchment paper, and butter the parchment. Dust with flour, and knock out the excess flour.
  2. Sift the flours, baking powder, baking soda, and salt together in a large bowl. Set aside.
  3. In the bowl of an electric mixer fitted with the paddle attachment, beat the butter and shortening on medium speed until creamy, 3 to 4 minutes. Add the sugar and vanilla and beat on medium speed until fluffy, about 3 minutes. Scrape down the bowl, add the egg, and beat until just combined. Turn the mixer to low. Add the flour mixture, alternating with the ice water, in three separate additions, beginning and ending with the flour mixture. Scrape down the bowl, then mix on low speed for a few more seconds.
  4. In a medium bowl, whisk the egg whites and cream of tartar until soft peaks form. Do not overbeat. Gently fold the egg whites into the batter.
  5. Divide the batter among the prepared pans and smooth the tops. Bake for 40 to 45 minutes, rotating the pans halfway through the baking time, until a toothpick inserted in the center of the cake comes out clean. Transfer the cakes to a wire rack and let cool for 20 minutes. Invert the cakes onto the rack, remove the pans, and let cool completely. Remove the parchment.

Make the white chocolate frosting:
  1. Using either a double boiler or a microwave, melt the white chocolate and set it aside to cool.
  2. In a medium heavy-bottom saucepan, whisk the sugar and flour together. Add the milk and cream to cook over medium heat, whisking occasionally, until the mixture comes to a boil and has thickened, about 20 minutes.
  3. Transfer the mixture to the bowl of an electric mixer fitted with the paddle attachment. Beat on high speed until cool. Reduce the speed to low and add the butter; mix until thoroughly incorporated. Increase the speed to medium-high and beat until the frosting is light and fluffy.
  4. Add the vanilla and white chocolate and continue mixing until combined. If the frosting is too soft, put the bowl in the refrigerator to chill slightly, then beat again until it is the proper consistency. If the frosting is too firm, set the bowl over a pot of simmering water and beat with a wooden spoon until it is the proper consistency.
Assemble the cake:
  1. Refrigerate the frosting for a few minutes (but no more) until it can hold its shape. Place one cake layer on a serving platter. Trim the top to create a flat surface, and evenly spread about 1 1/4 cups of the frosting on top. Add the next layer, trim and frost it, then add the third layer. Crumb coat the cake and put the cake in the refrigerator for about 15 minutes to firm up the frosting. Frost the sides and top with the remaining frosting. Garnish with a few white sprinkles or white nonpareils and refrigerate for 15 minutes to firm up the finished cake.
  2. This cake will keep beautifully in a cake saver at room temperature (cool and humidity free) for up to 3 days. If your room is not cool, place the in a cake saver and refrigerate for up to 3 days. Remove the cake from the refrigerator and let sit at room temperature for at least 2 hours before serving.

Tuesday, April 26, 2011

The Devil's Onion Eggs

Okay, you may be wondering why this post is called "The Devil's Onion Eggs"...Well I will tell you. You see, this Easter we found an interesting article in the Deseret News about dyeing eggs the old-fashioned way--with onion skins. Yep, you heard that right, onion skins! I was intrigued by this so I decided to try it out. And as you can see from the picture above, the eggs turned out beautifully. Okay, why the "Devil" then?...this one is pretty self-explanatory. What do you do with boiled eggs? You make deviled eggs out of them, of course! Hence the name: "The Devil's Onion Eggs" (plus they are so devilishly good).

The Devil's Eggs AKA deviled eggs. You will want to keep this recipe because they are extraordinarily yummy.

Here is the link for the Deseret News article: Dyeing Easter eggs with onion skins
And I am going to post it on here too. Hurrah!

Onion Skin Easter Eggs

Step 1: Collect a small bag of brown and red onion skins. Often the local grocery store will save the skins if asked.

Step 2: Soak the skins in warm water. This method of dyeing eggs works best if the skin pieces are large.

Step 3: Cut small squares of cloth big enough to cover the egg completely. Soak the cloths.

Step 4: Place the soaked onion skins around the egg.

Step 5: Wrap the soaked cloth around the egg and tie a string or elastic tightly at the top.

Step 6: Cook the eggs slowly.

You should gently cook your eggs, but not boil them. Below are instructions for cooking eggs in a shell.

Place eggs in a single layer in a saucepan. Add enough water to come at least one inch above the eggs. Cover and quickly bring just to boiling. Turn off heat. If necessary, remove the pan from the burner to prevent further boiling. Let the eggs stand, covered, in the hot water about 15 minutes for large eggs (about 12 minutes for medium, about 18 for extra-large).

Step 7: After cooking, immediately remove the cloth and skins and rinse the egg in cold water. Dry the egg, and then use a small amount of olive oil and rub the egg until it shines.

Remarkably, these dyed eggs taste nothing like onion. The end result is an egg that looks hand painted and good enough to display at any Easter feast.

Soak the onion skins.
Surround the egg with onion skins and wrap with cloth (we used cheesecloth).
The process.
Cook slowly in a pot of water.
The end result: beautiful, marbled eggs.

And then we dyed eggs the traditional way too, with good ol' food coloring and water.
Oh little brother...BYU and Batman, the two best things in life.

Deviled Eggs. My sister's fiance made these. It's not every day that you find a guy who can make delicious deviled eggs.

Deviled Eggs 
6 large eggs
2 tablespoons mayonnaise
1 tablespoon sour cream
½ teaspoon distilled white vinegar
½ teaspoon spicy brown mustard
¼ teaspoon granulated sugar
1/8 teaspoon salt
1/8 teaspoon ground black pepper

1. Place eggs in medium saucepan, cover with 1 inch of water, and bring to a boil over high heat. Remove the pan from heat, cover and let stand 15 minutes. Meanwhile, fill medium bowl with 1 quart water and 1 dozen ice cubes. Pour off water from saucepan and gently shake pan back and forth to crack shells. Transfer eggs to ice water with slotted spoon and let cool 5 minutes. (Or just use the Easter eggs you already boiled.)

2. Peel the eggs and slice in half lengthwise. Transfer the yolks to a small bowl. Add the remaining ingredients, mashing the mixture against the sides of the bowl until smooth.

3. Arrange the egg whites on a serving platter and fill with the yolk mixture, mounding the filling about ½ inch above the whites. (You could put the yolk mixture into a sandwich baggie and snip off the end and pipe it in that way. You could also use a nice decorating tip with a piping bag, or just a good ol’ spoon. Whatever floats your boat!) Serve immediately.
*Note: I am not a fan of mayo, so I decided to add sour cream in addition to the mayo. The sour cream gives these deviled eggs a little "tang" and makes them really scrumptious.

*Make-Ahead Note: You can make the deviled eggs up to 2 days ahead. Wrap the peeled egg white halves tightly with a double layer of plastic wrap and place the filling a zipper lock plastic bag, squeezing out all the air. Refrigerate until ready to fill and serve.

Wednesday, April 20, 2011

Meat and Potatoes

There's nothing quite like meat and potatoes. It's the classic Sunday dinner. It's the substantial dish of many cultures. It's pure American comfort food. And what's more American than barbecue chicken?

Red potatoes. New potatoes. Any name you give them, they are delicious.
I like red potatoes for mashing because they are soft and silky. Oh yes.

Asparagus. Crisp. Fresh. Delicious.

Butter makes everything better.
Sauteing.
Oven Barbecued Chicken, Parmesan Mashed Potatoes, Buttered Asparagus.
Oven Barbecued Chicken
  • 6 chicken thighs, bone-in
  • 1/3 cup chopped onion
  • 1 cup ketchup
  • 1/2 cup water
  • 1/3 cup white vinegar
  • 3 tablespoons brown sugar
  • 1 tablespoon Worcestershire sauce
  • 1 teaspoon mustard
  • 1/4 teaspoon dried thyme
  • 1/4 teaspoon salt
  • 1/8 teaspoon pepper 
  1. In a nonstick skillet coated with nonstick cooking spray, brown chicken over medium heat. Transfer to a 13-in. x 9-in. x 2-in. baking dish coated with nonstick cooking spray.
  2. Recoat skillet with nonstick cooking spray; cook onion over medium heat until tender. Stir in the remaining ingredients. Bring to a boil. Reduce heat; simmer, uncovered, for 15 minutes. Pour over chicken. Bake, uncovered, at 350 degrees F for 45-55 minutes or until chicken juices run clear and a meat thermometer reads 170 degrees F. 
Parmesan Mashed Potatoes
  • 3 pounds red new potatoes, unpeeled
  • 1 tablespoon salt, plus 1/2 teaspoon
  • 3/4 cup half and half
  • 1/4 cup butter
  • 1/2 cup sour cream
  • 1/2 cup freshly grated Parmesan
  • 1/2 teaspoon ground black pepper
  • 1/2 teaspoon garlic powder

  1. Place the potatoes and 1 tablespoon of salt in a 4-quart saucepan and add cold water to cover. Bring to a boil. Lower the heat and simmer, covered for 25 to 35 minutes, until completely tender. Drain.
  2. In a small saucepan, heat the half-and-half and butter. Put the potatoes into the bowl of an electric mixer fitted with a paddle attachment and mix the potatoes for a few seconds on low speed, to break them up. Slowly add the hot cream and butter to the potatoes, mixing on the lowest speed. 
  3. Fold in the sour cream, Parmesan cheese, the 1/2 teaspoon salt, pepper, and garlic powder; taste for seasoning and serve immediately. If the potatoes are too thick, add more hot cream and butter.
 
Buttered Asparagus
  • 3 tablespoons butter
  • 1 bunch fresh asparagus
  • salt, pepper, garlic powder
  1. Melt the butter in a large skillet over medium-high heat. Add asparagus spears; cover and cook for 10 minutes, stirring occasionally, or until asparagus is tender. Sprinkle asparagus with spices during cooking.

Sunday, April 17, 2011

Rice and Everything Nice


Rice and vegetables. Easy to make and even easier to eat. I like this stuff because it's simple and quick. And at times I find myself getting a craving for coconut cilantro lime rice. It's the perfect combination of slightly sweet and spicy.

Simplicity.

For the love of lime.


Coconut Cilantro Lime Rice
  • 2 cups rice
  • 2 cups water (or 4 cups if using brown rice)
  • 1 teaspoon salt
  • 3/4 cup sweetened flaked coconut 
  • 3/4 cup chopped fresh cilantro
  • 1/2 teaspoon garlic powder
  • 1/2 teaspoon cumin  
  • additional salt, if desired
  • 1 lime, juiced
  1. In a saucepan, stir together rice, water, and salt. Bring to a boil over high heat. Steam should be coming out from under the lid; keep the pot covered and don't peek under the lid.
  2. Reduce the heat to very low. The rice will swell as it absorbs the water. Set a timer for 20 minutes (or 40 minutes for brown rice).
  3. When the timer rings, turn off the burner and remove the pan from the heat. Let the rice sit, covered, for an additional 5 minutes.
  4. Fluff rice with a fork. Stir in coconut, cilantro, garlic powder, and cumin. Add in the lime juice. Adjust seasonings to taste.

Sauteed Vegetable Medley
  • 1 tablespoon olive oil
  • 1 teaspoon minced garlic
  • 1/2 red bell pepper, chopped
  • 1/2 yellow bell pepper, chopped
  • 6 mushrooms, chopped
  • 4 broccoli florets, chopped
  • 1/2 zucchini, chopped
  • 1/2 yellow summer squash, chopped
  • 1/2 teaspoon dried oregano
  • 1/2 teaspoon cumin
  • 2 tablespoons soy sauce
  • 1/4 cup chicken stock
  • squeeze of lime juice

  1. In a large saute pan over medium-high heat, add the olive oil and heat. Add the garlic and saute, stirring, for 1 minute. 
  2. Add the all of the vegetables and cook until just starting to wilt, about 2 minutes. 
  3. Add the oregano, cumin, soy sauce and chicken stock and stir well and cook just until vegetables are wilted, about 3 minutes.
  4. Remove from heat and drizzle with lime juice.
*Note: If you like blackened vegetables, cook for an additional minute on high heat.

Thursday, April 14, 2011

Dark and Delicious

Dark. Delicious. Divine. This dark chocolate cake is so good it should be outlawed.  I can honestly say that this is the best chocolate cake I have ever tasted/made.  The cake recipe is adapted from Essence of Chocolate by John Scharffenberger. 
 

Chopping the chocolate.

First layer.
 
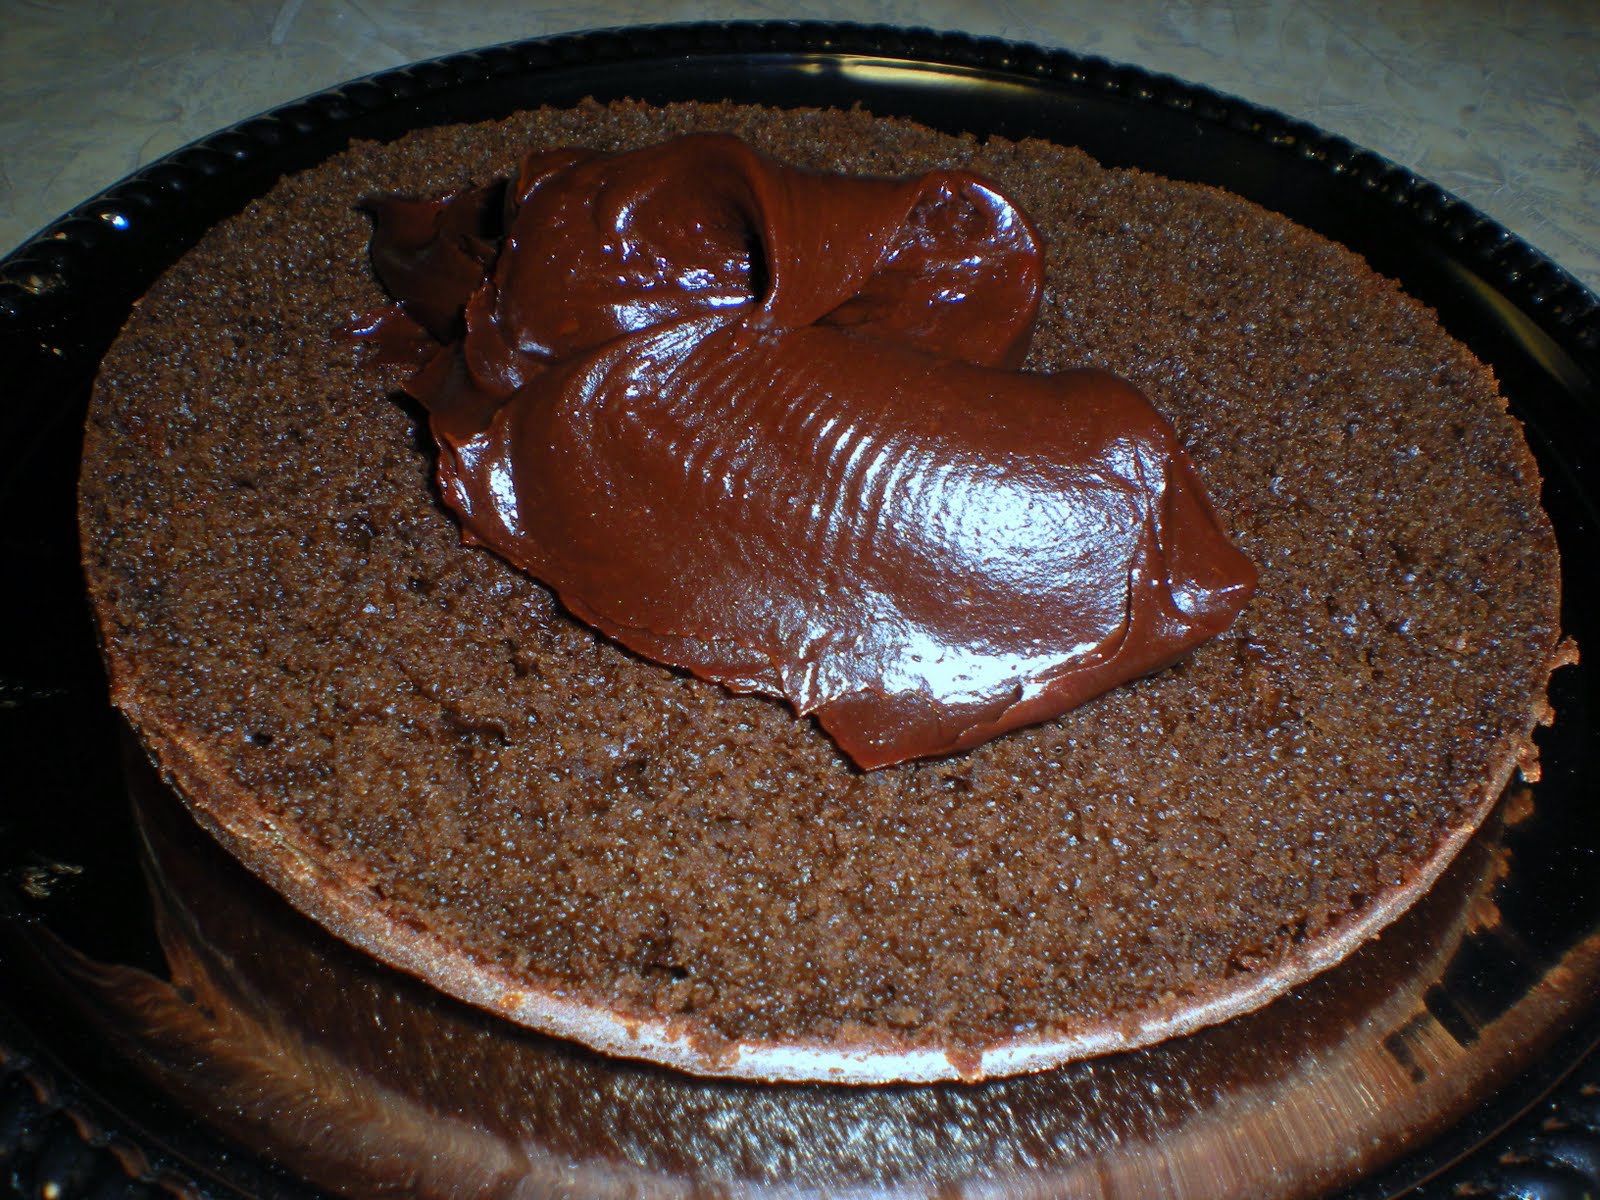
Frosting a total of four layers.

Done with the frosting. Jordan did the swirly top and I did the wavelike sides.

Okay, I want you to check this out. This first picture is with a flash...

This second picture is without a flash. Isn't it incredible how big of a difference the flash on your camera makes? Which one do you like? With or without the flash?

Top of the cake (kudos to Jordan and his OCD).

Yay for cake!

I LOVE this picture. Not sure why, but I just do.

Crumb.

Plate-licking good.


Dark Chocolate Cake
  • 1 cup white granulated sugar
  • 1 cup brown sugar
  • 1 3/4 cups all-purpose flour
  • 3/4 cup, natural unsweetened cocoa powder
  • 1 teaspoon salt
  • 1 1/2 teaspoon baking powder
  • 1/2 teaspoon baking soda
  • 2 large eggs, lightly beaten
  • 1 teaspoon vanilla
  • 1/2 cup canola oil
  • 1 cup whole milk
  • 1 cup boiling water
Frosting
  • 1 1/4 cups white granulated sugar
  • 1 cup heavy cream
  • 5 ounces 99% unsweetened chocolate, finely chopped
  • 1 stick (1/2 cup) butter
  • 1 teaspoon vanilla

1. Preheat oven to 350 F. Lightly butter the bottom of 2 9-inch round cake pans. Line the bottom of the pans with parchment paper. Butter and lightly flour the parchment paper and sides of the pans. 

2. In a large bowl, combine the sugars, flour, cocoa powder, salt, baking powder, and baking soda. With an hand mixer, beat in the eggs, oil, and milk on low speed. Increase the speed to medium and mix for 2 minutes. Reduce the speed to low and add the boiling water. Don't worry, the batter will be soupy.

3. Divide the batter between the 2 pans and bake for 30 - 35 minutes. Remove from oven and cool on a wire rack for 5 minutes, then remove the cake from the pans and cool on rack.

4. To make the frosting, combine sugar and cream in a small saucepan and bring to a boil on medium heat. Stir occasionally. Once boiling, reduce the heat and simmer for 5 minutes. Add the chocolate and butter and stir until melted. Remove from heat, pour into a bowl and add vanilla. Cool the frosting until it becomes thick and spreadable. Do not ice the cake until it is completely cooled.

*Note, I cut each of my 2 cakes lengthwise with a long serrated knife for a total of 4 layers.

Tuesday, April 12, 2011

P is for Pasta


Many different cultures eat some sort of noodle-like food, varying from Greek itrion made up of flour and water to Israeli itrium, a kind of boiled dough.  But pasta is believed to have originated from China.  In China, noodles of wheat, millet or rice have been eaten for thousands of years.  However, we cannot deny the Italian claim to fame of inventing the pasta dish.  Italian pasta is made from durum wheat and water, formed into various shapes, and boiled in water.  

Pasta is often eaten hot with a tomato-based sauce, but not today.  Nope.  Today it is cold with a vinegar-based sauce.  I must admit that I HATE pasta salads.  Actually, I despise them.  They are called Macaroni Salads.  Do you know which ones I am talking about?  The pasta salads that are full of macaroni, mayonnaise, mustard, and celery.  The pasta salads that make you think of that hot summer day at the local social picnic, where the salad has been sitting out for hours and and the flies are a buzz around it.  Yes, those pasta salads.  Yuck.  Bleh.  Ick.  BUT this pasta salad is different.  It is fresh.  It is flavor-packed.  It is delicious.  Full of penne, spinach, olives, tomatoes, green onions, feta, and vinaigrette, this pasta salad will being a smile to your face :)

Italian Pasta Salad
  • 1 pound penne pasta
  • 2 cups black olives, drained and chopped
  • 3 tomatoes, chopped
  • 1/2 cup green onions, chopped
  • 1/2 cup marinated banana peppers, chopped
  • 2 handfuls of spinach, cut into bite-size pieces
  • 1 cup feta cheese, crumbled
  • 1 (.7 ounce) package dry Italian-style salad dressing mix
  • 1/2 cup olive oil
  • 1/2 cup balsamic vinegar
  • 1 teaspoon dried oregano
  • 1 teaspoon dried basil
  • 1/2 teaspoon dried parsley
  • 1/2 teaspoon garlic powder
  • salt and ground black pepper to taste
  1. Cook the pasta in a large pot of salted boiling water until al dente.  Drain and cool under cold water.
  2. In a small bowl, mix together the envelope of dressing mix, herbs, garlic powder, salt, pepper, vinegar, and oil.  Set aside.
  3. In a large bowl, combine the pasta, olives, tomatoes, green onions, and peppers.  Pour the dressing over the pasta mixture.  Stir in the spinach.  Gently fold in the feta cheese.
  4. Cover and refridgerate for at least one hour.
  5. Serve cold.
*Feel free to add in any of your favorite dressing mixes.  Some options include: sun-dried tomato vinaigrette, raspberry vinaigrette, or Caesar dressing.

Yummo.

Tuesday, April 5, 2011

Chicken Alfredo Pizza

 Pizza. There's just something about it that is so magical. The crispy yet soft crust, the melted stringy cheese, the sweet warm tomatoes. That first bite. The way the oozing sauce and cheese dribbles onto your chin. The sweet and savory flavors blending so perfectly in your mouth. It's all so enticing.


Okay, so I decided to refrigerate my dough for 24 hours before rising and baking. YES, 24 hours! Apparently it makes your pizza crust easier to work with, and gives it have a better texture and flavor. After trying it out, I concur with all of the above. It makes your pizza go from good to AMAZING. I will refrigerate my pizza dough from now on--and hey, maybe I will try it with other breads too.
This dough was incredibly pliable and absolutely perfect. I am telling you, refrigerating it is key.
I have a confession...I used to work at Papa Murphy's Pizza. You heard that right. Me (Sarah) was once an employee of the classic take'n'bake pizza franchise. I do not have many fond memories, but I did get to experiment with the dough and all the wonderful toppings. My favorite thing to do was to make the stuffed Chicago pizza with a braided crust. So here it is, the braided crust.
Creamy garlic Alfredo sauce, mozzarella and Parmesan cheese, spinach, tomatoes, and grilled chicken. Oh yes.
The final product. Now that some lovin' in the oven.


Chicken Alfredo Pizza

  • 2 tablespoons sugar
  • 1 teaspoon salt, to taste
  • 1 tablespoon pure olive oil
  • 3/4 cup warm water
  • 2 cups flour
  • 1 teaspoon instant yeast
  • 2 teaspoons olive oil
  • Olive oil, for the pizza crust
  • Flour, for dusting

Toppings:


  • 1 cup Alfredo sauce, jazzed up with some garlic and basil
  • 1/2 teaspoon herbs, oregano, basil, thyme
  • A combination of 3 grated cheeses such as mozzarella, Parmesan, Monterrey Jack, provolone
  • Spinach, green onions, tomatoes, grilled chicken (all chopped, of course)

  1. Mix the sugar, olive oil, water, and yeast a bowl. Let this sit for about 5 minutes. Then stir in 1 cup of flour and salt. Add remaining cup of flour into a standing mixer's work bowl. Using the paddle attachment, start the mixer on low and mix until the dough just comes together, forming a ball. Lube the hook attachment with cooking spray. Attach the hook to the mixer and knead for 15 minutes on medium speed. (Or you can do this by hand. Yay.)
  2. Roll the pizza dough into a smooth ball on the countertop. Place into a stainless steel or glass bowl. Add 2 teaspoons of olive oil to the bowl and toss to coat. Cover with plastic wrap and refrigerate for 18 to 24 hours.
  3. Preheat oven from 450 to 500 degrees F. Split the pizza dough into 2 equal parts using a knife. Flatten into a disk onto the countertop and then fold the dough into a ball.
  4. Wet hands barely with water and rub them onto the countertop to dampen the surface. Roll the dough on the surface until it tightens. Cover one ball with a towel and rest for 30 minutes.
  5. Repeat the steps with the other piece of dough. If not baking the remaining pizza immediately, spray the inside of a ziplock bag with cooking spray and place the dough ball into the bag. (This can be refrigerated for up to 6 days.)
  6. Sprinkle the flour onto the countertop and roll out using a rolling pin, or toss in the air with your hands. Place the stretched dough onto a sprayed pan. (Dress and bake the pizza immediately for a crisp crust or rest the dough for another 30 minutes if you want a chewy texture.)
  7. Brush the crust of the pizza with olive oil. Spread the pizza sauce evenly onto the pizza. Sprinkle the herbs onto the pizza and top with the cheese. Lay down spinach, green onions, tomatoes, and chicken. Top off with a sprinkling of Parmesan cheese.
  8. Bake for 10 minutes, or until bubbly and golden brown. Rest for a few minutes before slicing.
  9. Devour.
Related Posts Plugin for WordPress, Blogger...